 IndieBase

Table of Contents
Event Config
How to manage your team event type options from the dedicated Event Config page
Event Config
Event Config is where you manage the list of event types available to your team — things like Sport, Motorsport, and Music. Set it once, and it applies everywhere events are created or edited across your account.
Overview
When your team creates or edits an event, the Type field shows a dropdown of options. Event Config is where you control what those options are.
Previously, event type options were configured inside each individual configuration template. They're now managed in a single place at the team level, which means any changes you make here are immediately reflected across the whole application — you don't need to update each template separately.
Active subscription required. Event Config is available to teams with an active subscription. If you don't see the Event Config option in your sidebar, check your team's subscription status.
Before You Start
- You must be a team administrator or team owner to access Event Config.
- The feature requires an active subscription.
Getting to Event Config
- Open the sidebar and expand the Configuration section.
- Click Event Config.
You'll land on the Event Configuration page for your team.
The Event Type Options List
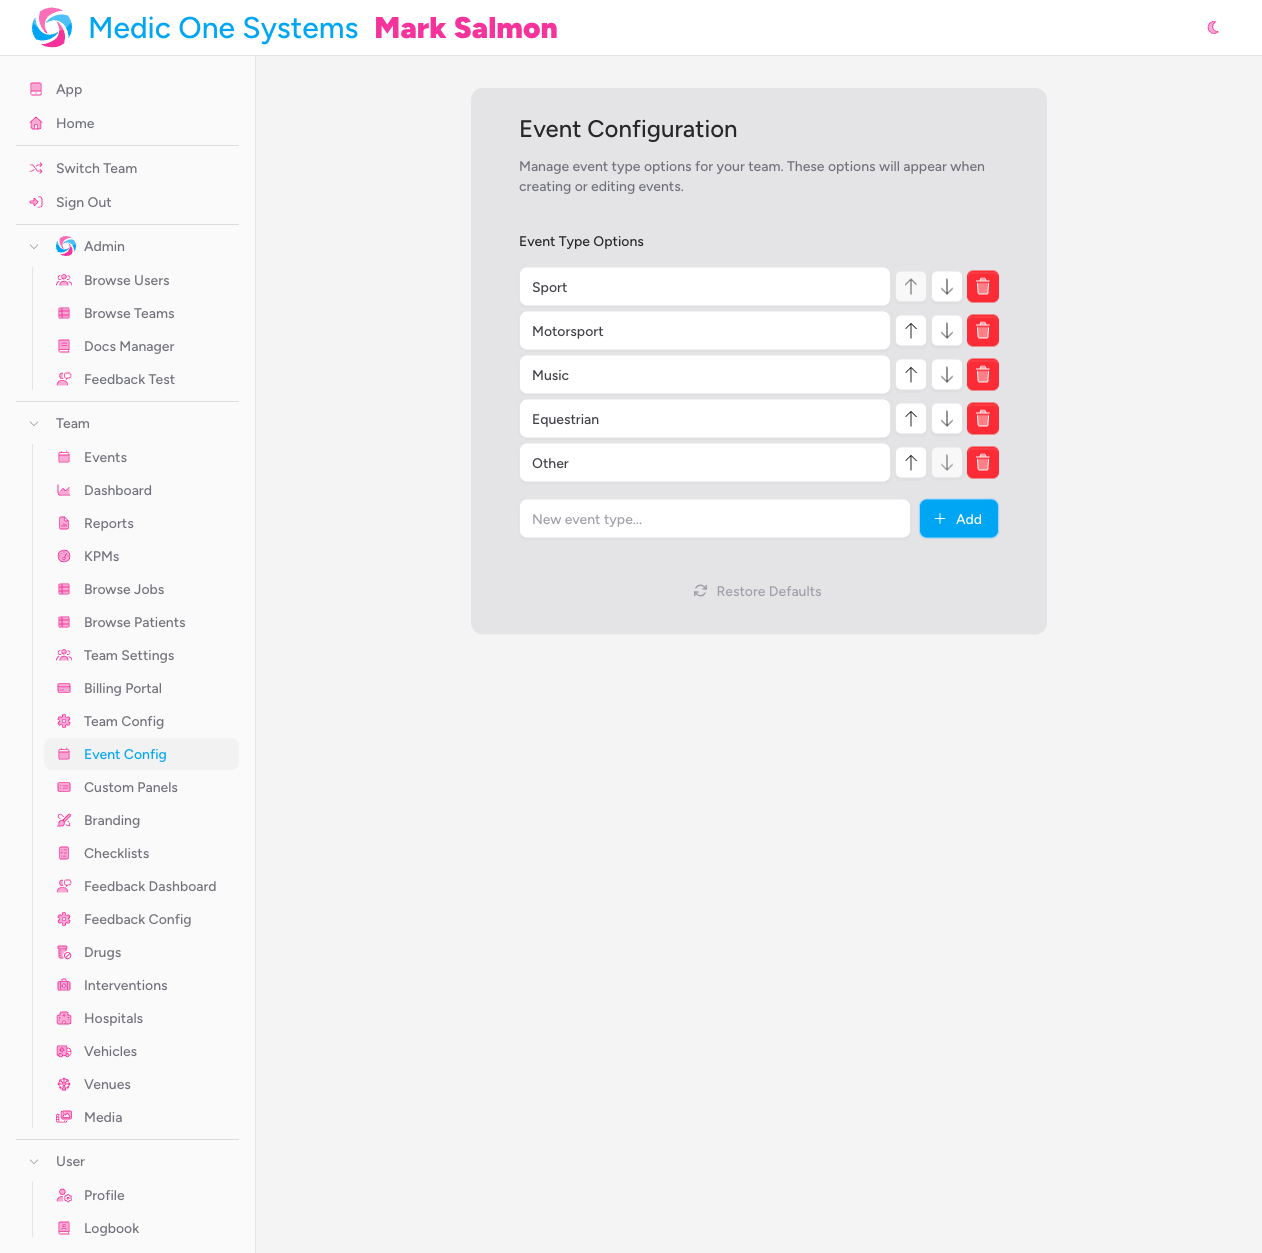
The page shows your current list of Event Type Options — one option per row. By default, five options are pre-configured:
- Sport
- Motorsport
- Music
- Equestrian
- Other
Each option row has three action buttons on the right: an up arrow, a down arrow, and a delete button (the red bin icon).
Adding an Event Type
- In the New event type... field at the bottom of the options list, type the name of the new event type.
- Either click the Add button, or press Enter.
The new option appears at the bottom of the list and is saved automatically.
Duplicate values are silently ignored — if you try to add an option that already exists, nothing will happen. Check the existing list before adding.
Editing an Existing Option
You can edit any option's name directly in its text input field.
- Click into the text field for the option you want to change.
- Edit the text.
- Click or tab away from the field to save.
The change is saved automatically as soon as you leave the field.
Reordering Options
The order of options here is the order they'll appear in the Type dropdown when creating or editing an event.
To move an option:
- Click the up arrow button to move it one position up the list.
- Click the down arrow button to move it one position down the list.
The buttons are disabled when an option is already at the top or bottom of the list. Changes are saved automatically after each move.
Removing an Option
Click the red delete button (bin icon) on the right of any option row to remove it.
The option is removed immediately and the list is saved automatically.
You must always have at least one event type option. The delete button is disabled when only one option remains in the list.
Removing an option does not affect existing events that are already set to that type — those records retain their saved value. The removed option simply won't be available for selection on new or future events.
Restoring Defaults
If you want to start fresh, click Restore Defaults at the bottom of the page.
This resets your event type options back to the five standard values:
- Sport
- Motorsport
- Music
- Equestrian
- Other
Any custom options you've added will be removed. A confirmation toast notification appears once the reset is complete.
Job Planning
Further down the same page is a separate Job Planning section, unrelated to the event type list above. This controls whether your team can pre-plan transport jobs in advance — useful for patient transport service (PTS) work where the day's runs are known ahead of time rather than created as they happen.
Turn on the Enable job planning switch to activate it.
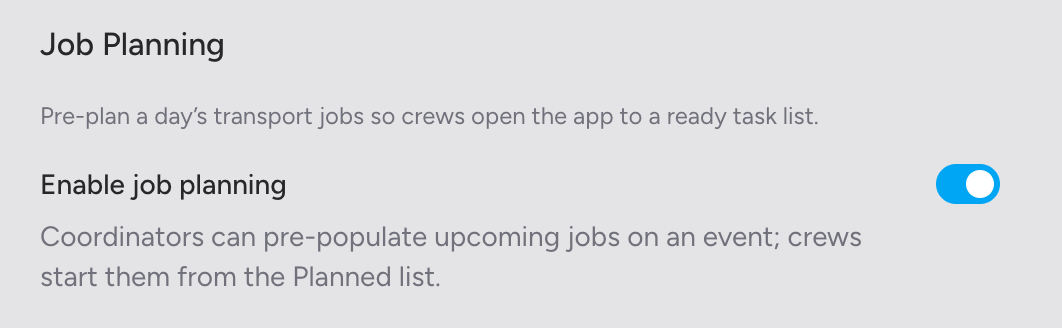
Once enabled:
- A Planned jobs panel appears in the Control Room for every event, where coordinators can add, edit, and cancel planned runs.
- A Planned section appears in the app above the ordinary jobs list, where crew can see and start their planned runs.
A confirmation toast — "Job planning enabled" or "Job planning disabled" — appears immediately when you toggle the switch, and the change takes effect straight away for your whole team.
Job Planning requires an active subscription, in the same way Event Config itself does. If your team's subscription lapses, planned jobs won't be available even if the switch is left on.
See Planning Jobs in Advance and Starting a Planned Job for the full coordinator and crew workflows once this is switched on.
Crew Management
Below Job Planning is the Crew Management section. This decides who is allowed to create and edit crews across your team — and it applies everywhere, not just at events.
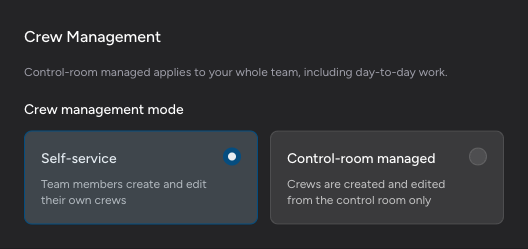
Two options are presented as cards under Crew management mode:
| Option | What it means |
|---|---|
| Self-service (default) | Team members build, edit, and select their own crews from the app or the admin portal — the ordinary workflow described in Managing Crews and Setting Up Your Crew. |
| Control-room managed | Only team administrators (or anyone with the Crews: Update permission) can create or edit crews, from the admin portal or the Control Room's Crew Builder. Everyone else stops seeing crew-creation controls in the app — they wait to be added to a crew instead. See Working in a Control-Room Managed Team for exactly what your team will see. |
Click a card to switch immediately — there's no separate save step. A confirmation toast appears straight away: "Crew management set to control-room managed" or "Crew management set to self-service", and the change takes effect for your whole team from that moment on.
This is a whole-team setting, not a per-event one. Control-room managed mode governs standalone day-to-day jobs exactly the same way it governs jobs on a live event — there's no way to make one event stricter than another. This replaces the old Crew Management dropdown that used to appear on the individual event edit form; that field has been removed, and this team-level setting is now the only control, whichever event (or no event) you're working in.
Switching back to Self-service restores normal crew self-service for everyone straight away — nothing needs to be rebuilt or reassigned. Every change to this setting, in either direction, is recorded in your team's audit trail along with who made it and when.
Flipping the mode never disrupts crews already in place. Existing crews keep working exactly as they were — the mode only governs whether new crews can be created or existing ones edited from that point on.
Tips
- Keep the list focused. Only include event types that are genuinely relevant to the kinds of events your team operates at. A shorter, accurate list makes the dropdown easier to use under pressure.
- Order matters. Put the most commonly used event types at the top so they're quick to find. If your team primarily covers motorsport events, move Motorsport to the first position.
- Changes apply immediately. As soon as you save a change, it's live for all team members. There's no need to publish or push the update — it takes effect the next time anyone opens the event creation or edit form.
Troubleshooting
I can't see Event Config in the sidebar. This feature requires an active subscription. If your team is on the free plan or its subscription has lapsed, the menu item won't appear. Check your team's subscription under Billing Portal in the Configuration section of the sidebar, or contact your team owner.
I can't access Event Config even though my team has an active subscription. Only team administrators and owners can access this page. If you're a standard team member, you won't see it. Ask your team owner to grant you administrator access if you need to manage event configuration.
The delete button on an option is greyed out. You must keep at least one event type option in the list at all times. The delete button is disabled when only one option remains. Add another option first, then remove the one you don't need.
I edited an option name but the change isn't showing when creating events. Make sure you clicked or tabbed away from the text field after editing — the save happens when the field loses focus. If it still hasn't updated, try refreshing the app.
A team member says they can no longer create or edit their crew. Check the Crew Management setting above. If it's set to Control-room managed, self-service crew creation is switched off for everyone except administrators — this is expected. Either switch it back to Self-service, or add/edit the crew for them from the Home page, an event page, or the Control Room's Crew Builder.
I can't find the old per-event Crew Management dropdown on the event edit form. It's been removed. Crew management mode is now set once, here on the Event Config page, for your whole team — see Crew Management above.
Related: Managing Team Config | Setting Up a New Event | Planning Jobs in Advance | Starting a Planned Job | Managing Crews | Working in a Control-Room Managed Team