 IndieBase

Table of Contents
Deployment Plans
Create reusable crew templates for your venues so you can set up an event in seconds, not minutes.
Deployment Plans
Create reusable crew templates for your venues so you can set up an event in seconds, not minutes.
Overview
A deployment plan is a saved crew structure tied to one of your team's venues. It defines a list of template crews — each with a callsign, vehicle, station location, and target headcount — that can be applied to an event with a single click.
When you apply a plan, IndieBase generates the corresponding crew shells across your event's shifts automatically. You can also go the other way: once an event is running, save the current crew structure as a new plan to reuse later.
Deployment plans only appear when an event is linked to a venue. If your team doesn't use venues yet, see Managing Venues to get started.
Before You Start
- You must have the Super Admin team role (or be the team Owner) to create, edit, or delete deployment plans. This is a deeper level of access than the standard Admin role — see Team Roles if you're not sure which role you have.
- Deployment plans are tied to specific venues. The event you're working with must be linked to a venue for plans to appear.
- Venues and deployment plans require an active subscription. If you don't see the Venues option in the sidebar, check your team's subscription.
Setting Up Venue Location Types
Before building a deployment plan, it's worth making sure your venue's locations are properly typed. Location types determine how they appear in the station picker when you're building a plan.
There are three location types:
| Type | Badge colour | Purpose |
|---|---|---|
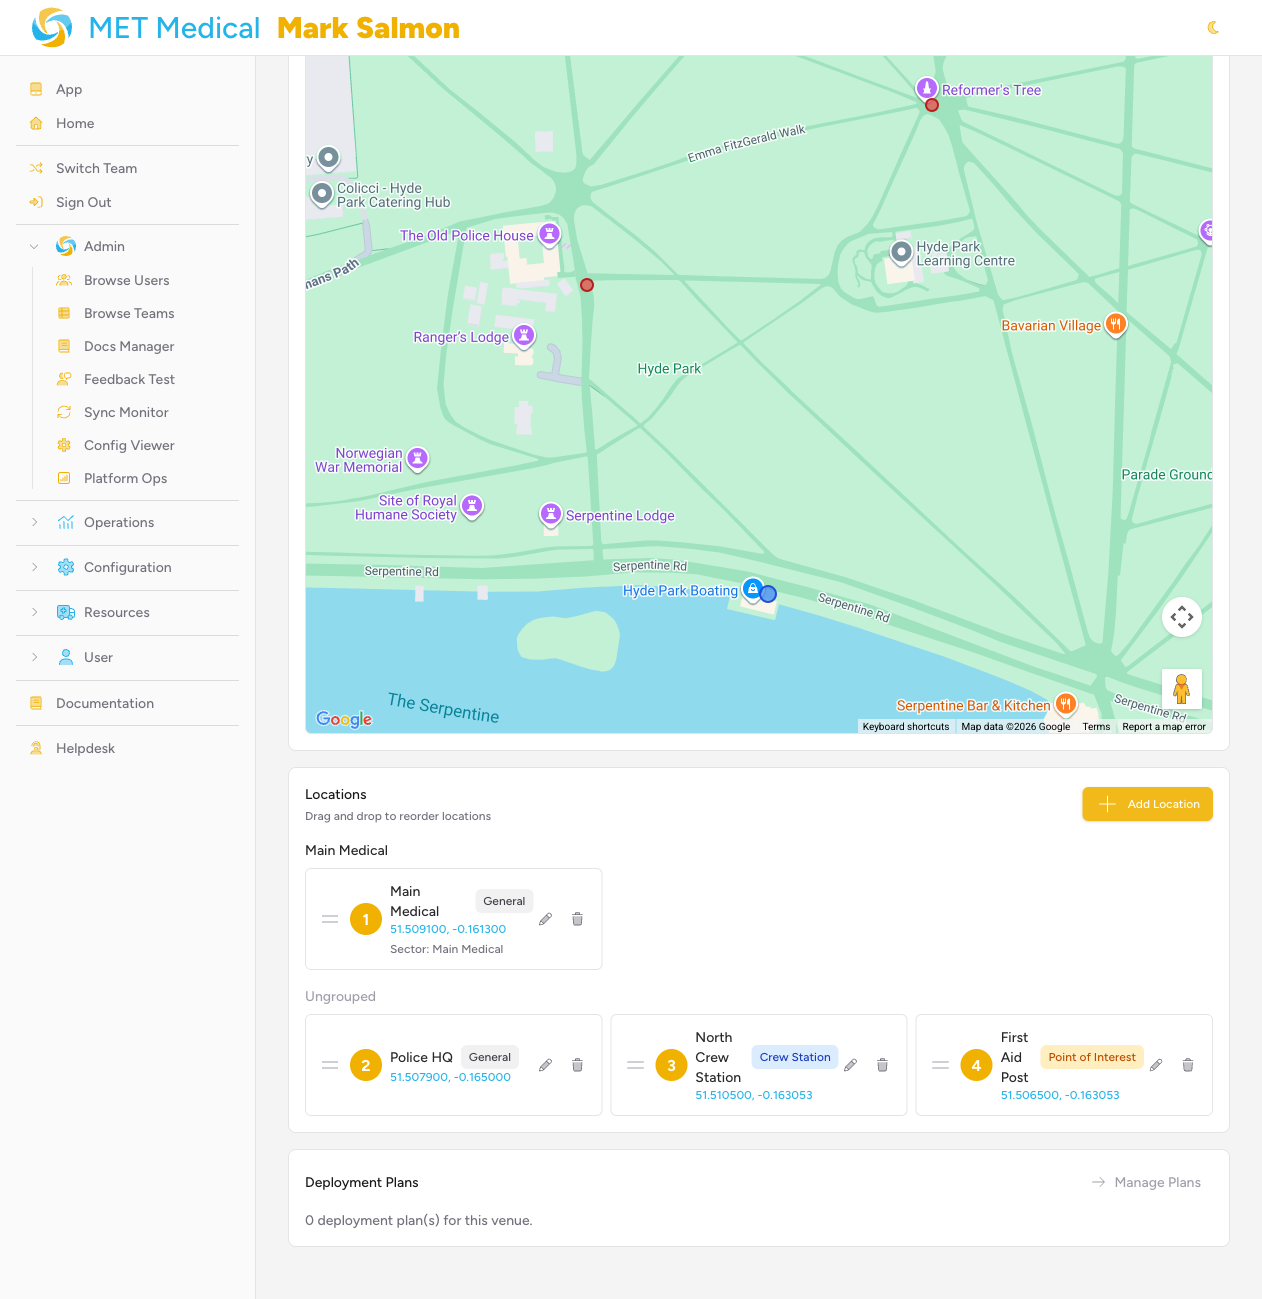
| General | No badge | General reference points (e.g. entrance, car park) |
| Crew Station | Blue | Named stations where crews operate from |
| Point of Interest | Amber | Landmarks, hazards, or reference points for responders |
When assigning a station to a crew in a deployment plan, only General and Crew Station locations appear in the dropdown. Points of Interest are excluded.
Setting a Location Type
-
In the sidebar, expand Resources and click Venues.
-
Find your venue and click Manage.
-
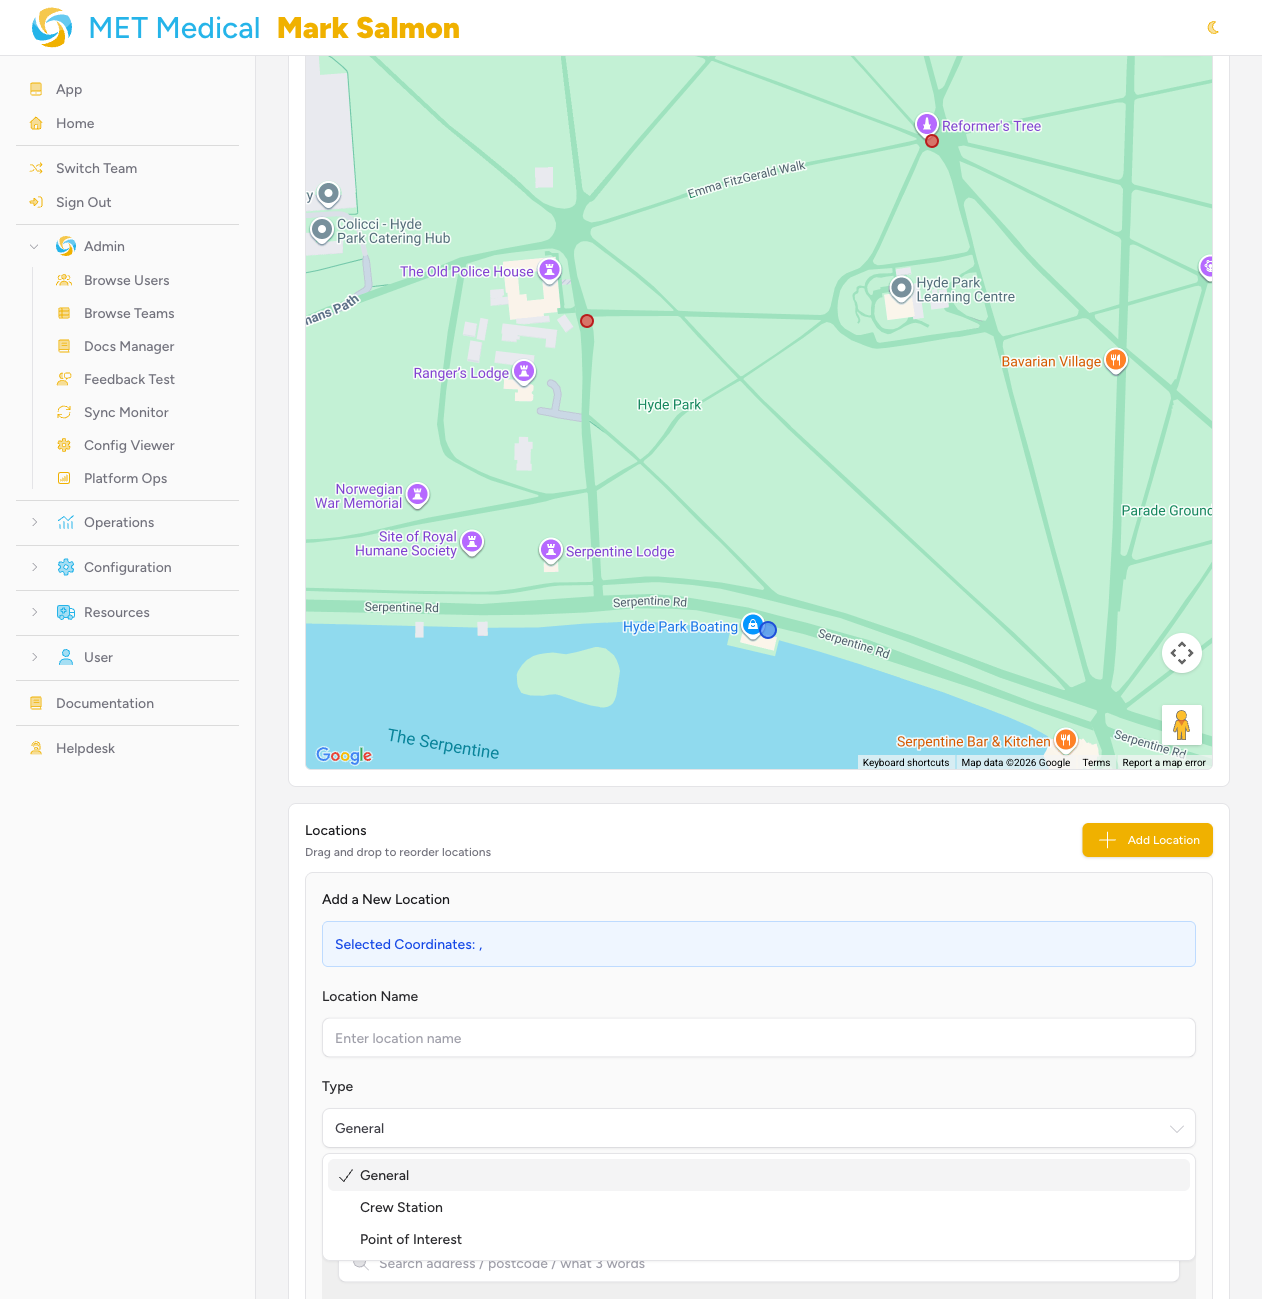
In the Locations panel, click the pencil icon on any location.
-
In the edit form, use the Type dropdown to select General, Crew Station, or Point of Interest.
-
Click Update Location to save.
The location list shows a coloured badge next to each location name indicating its type — blue for Crew Station, amber for Point of Interest.
Creating a Deployment Plan
Deployment plans are managed from the venue's page, not the event itself.
Step 1: Open the Venue's Plans
-
In the sidebar, expand Resources and click Venues.
-
Click Manage on the venue you want to create a plan for.
-
Scroll down to the Deployment Plans panel and click Manage Plans.
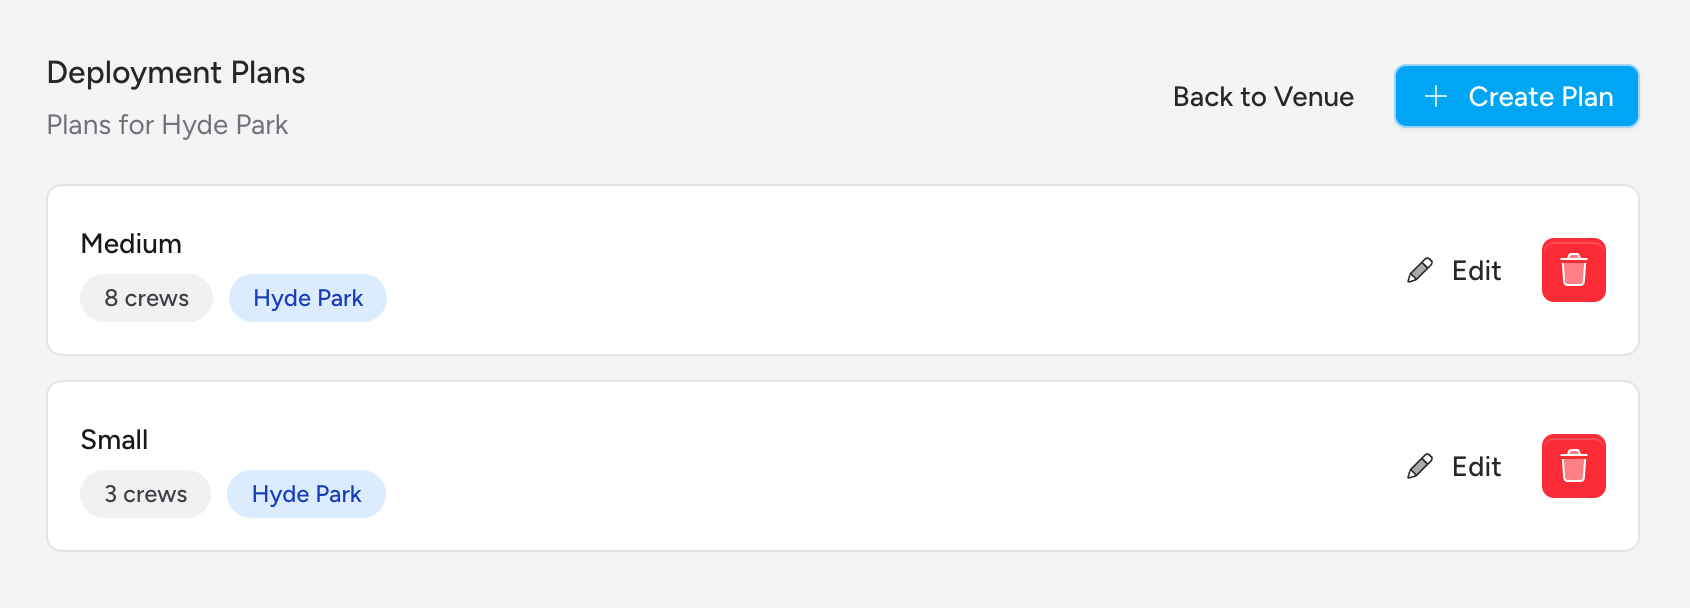
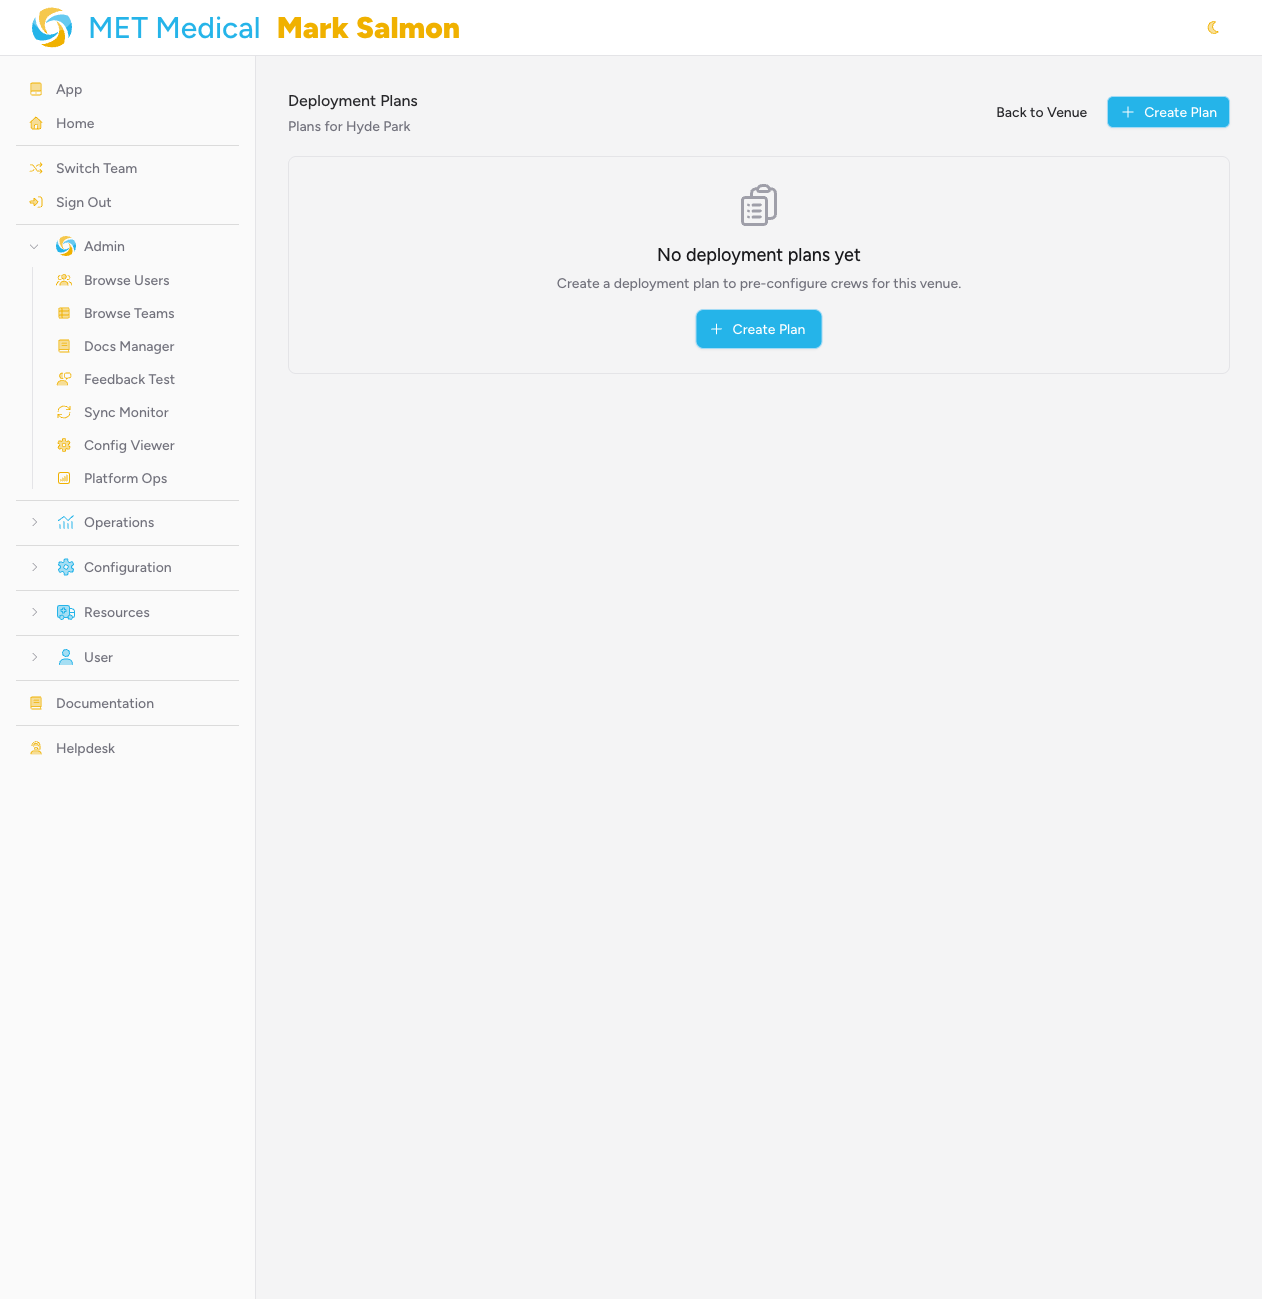
You'll land on the Deployment Plans index page for that venue. Any existing plans are listed here. If none exist yet, you'll see an empty state.
Step 2: Create the Plan
Click Create Plan in the top-right corner.
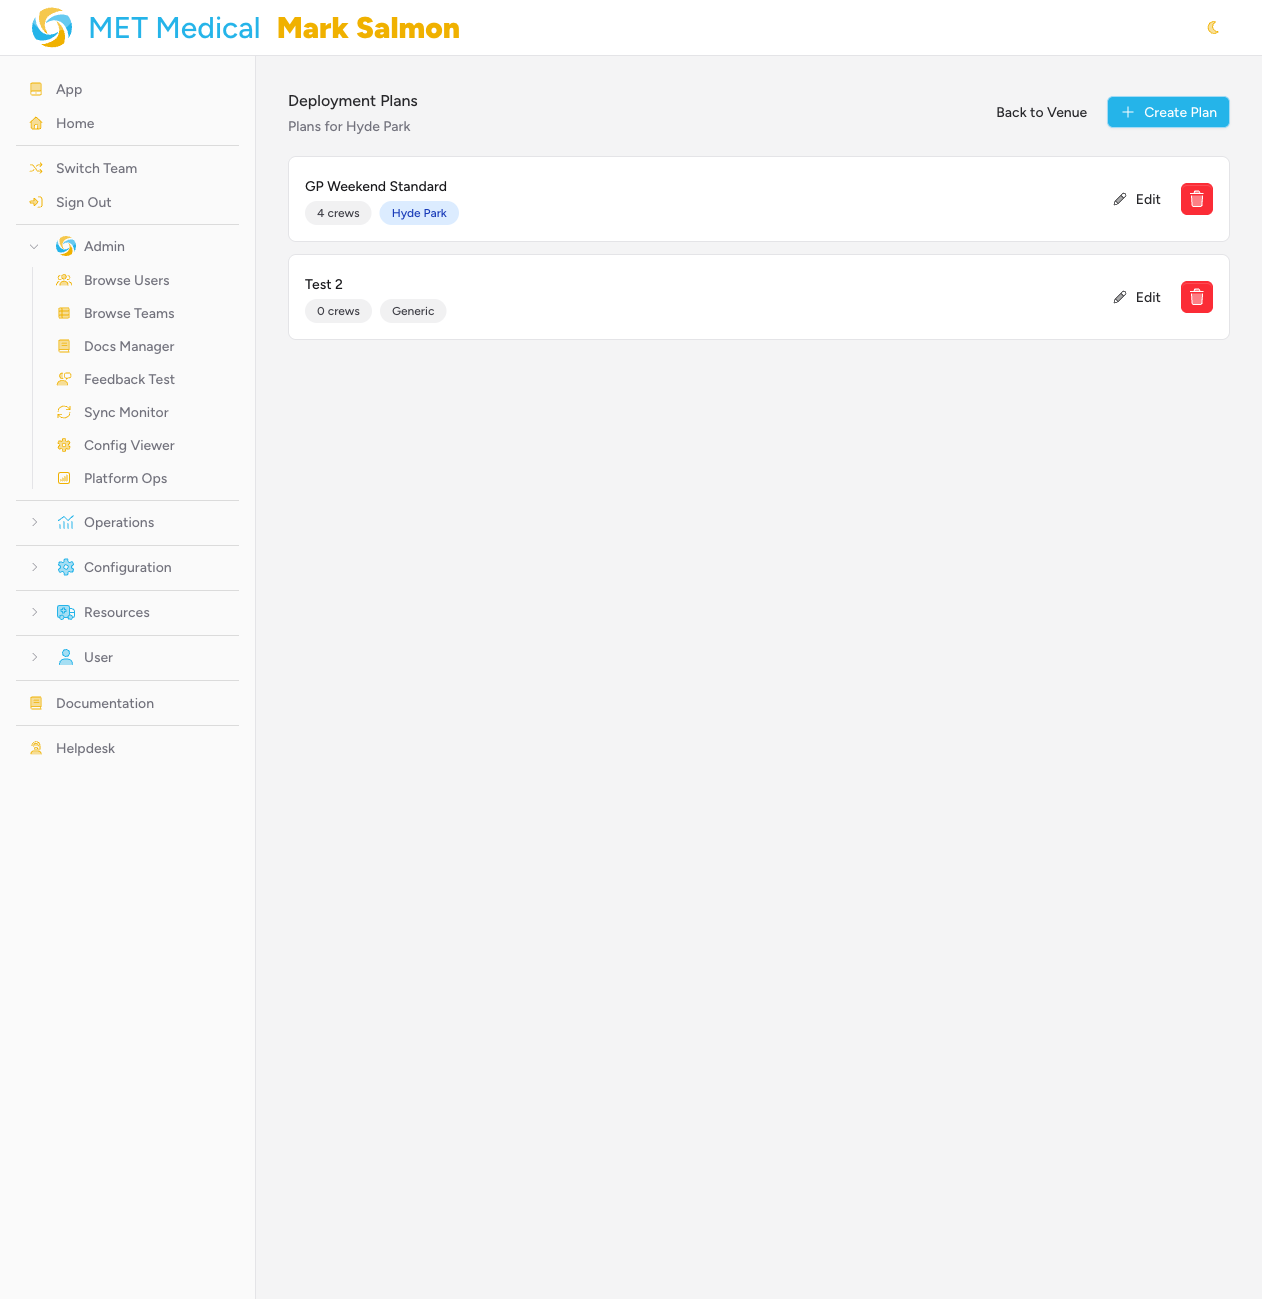
You'll be taken to the Create Deployment Plan page.
Step 3: Name the Plan
Enter a descriptive name in the Plan Name field — something that identifies the event type or operational context this plan is for (e.g. GP Weekend Standard, Festival Minimal Footprint). The name can be up to 100 characters.
Click Save Plan to create the plan and unlock the crew editor.
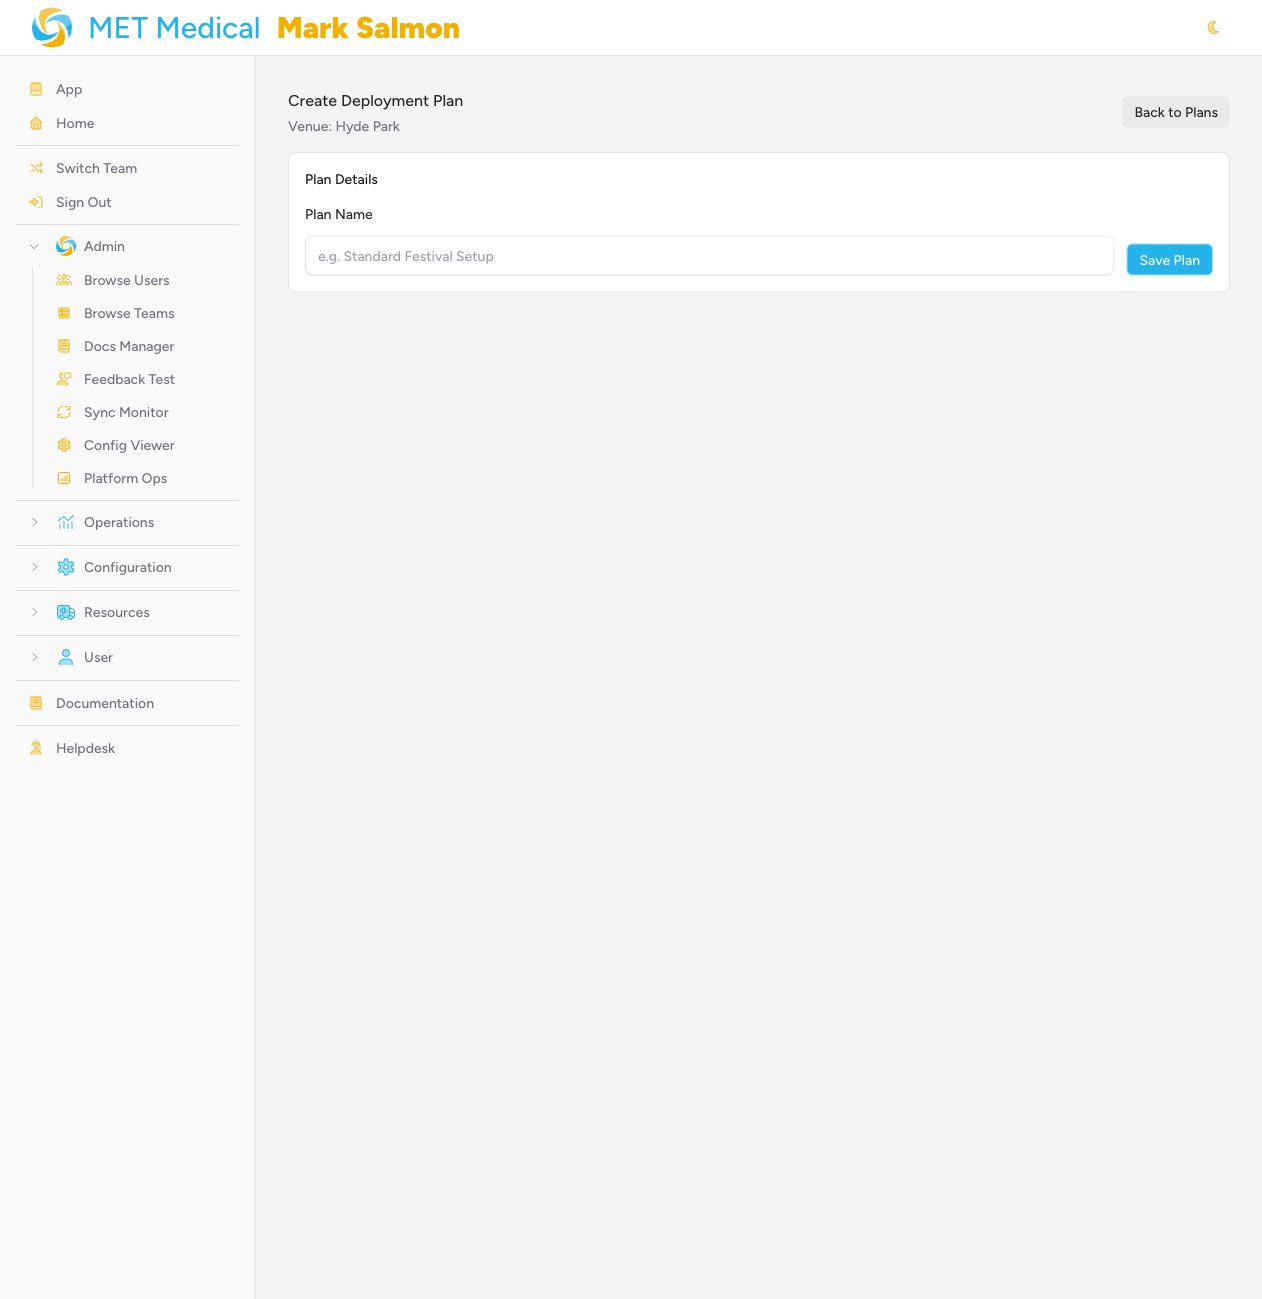
Step 4: Add Template Crews
Once the plan is saved, the Template Crews section appears below.
Click Add Crew to open the crew form.
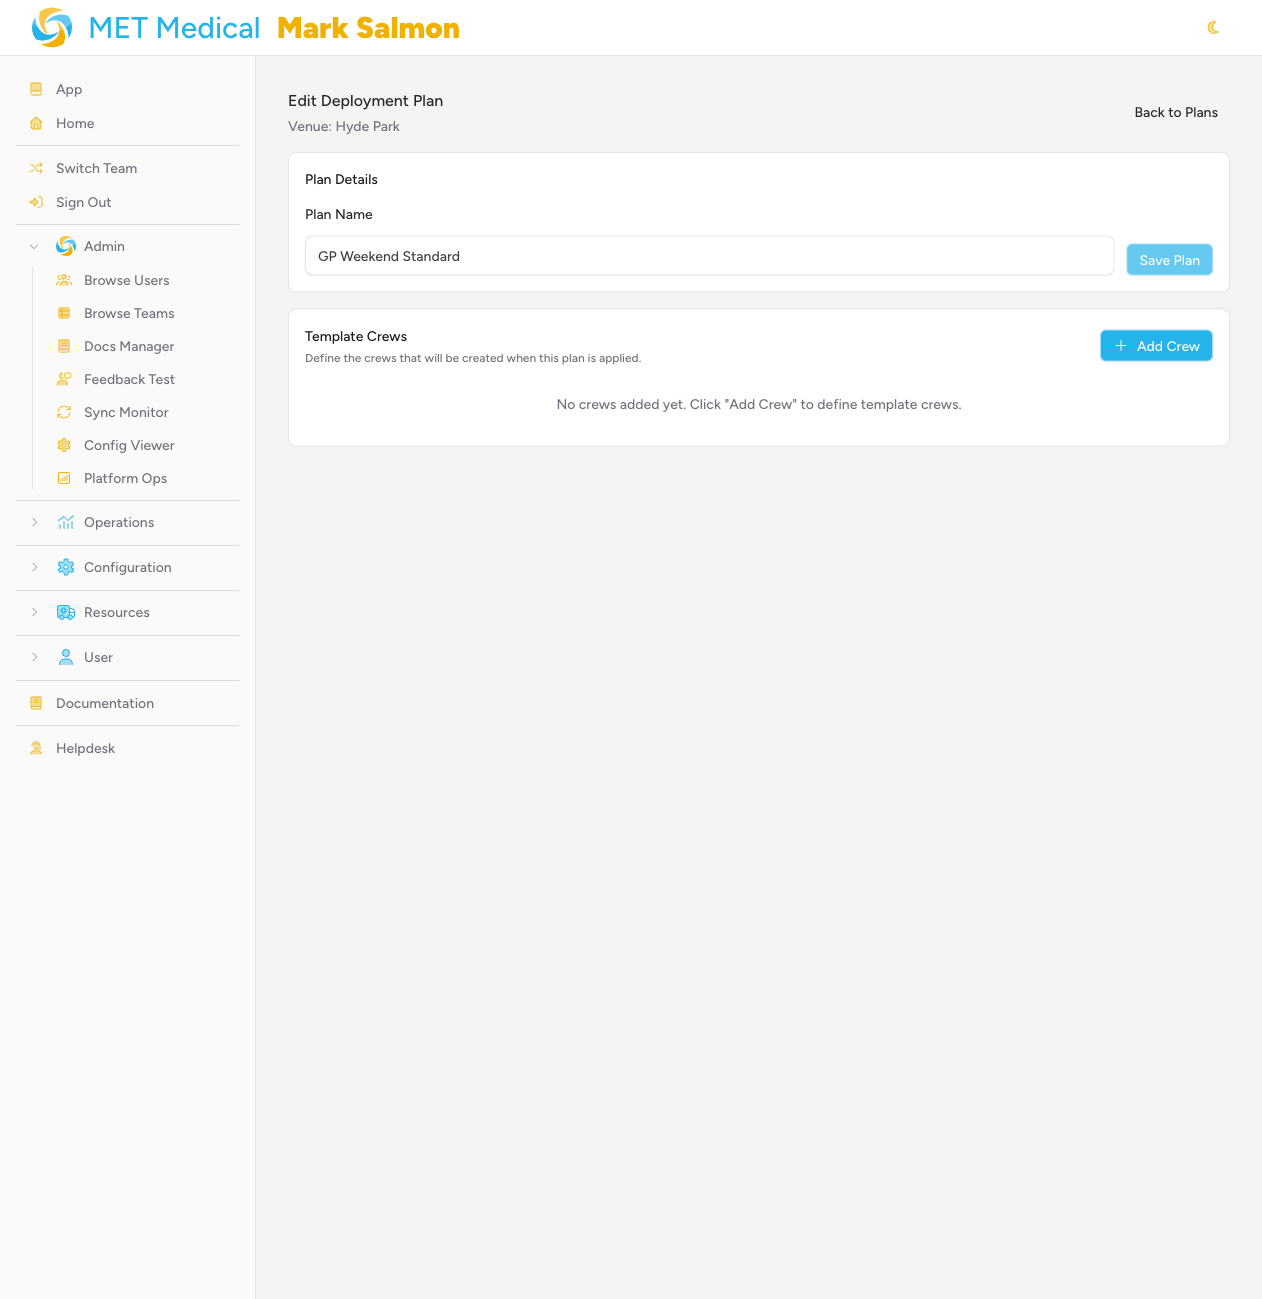
Fill in the crew details:
| Field | Required? | Notes |
|---|---|---|
| Callsign | No | The crew's identifier (e.g. Alpha 1, MED 3) |
| Section | No | Groups this crew with others under a section heading (e.g. North Arena) |
| Vehicle | No | Select from your team's vehicle list |
| Station | No | The venue location this crew operates from (General and Crew Station types only) |
| Headcount | No | Target number of people for this crew - used to drive the staffing indicator |
Click Add Crew to save it to the plan.
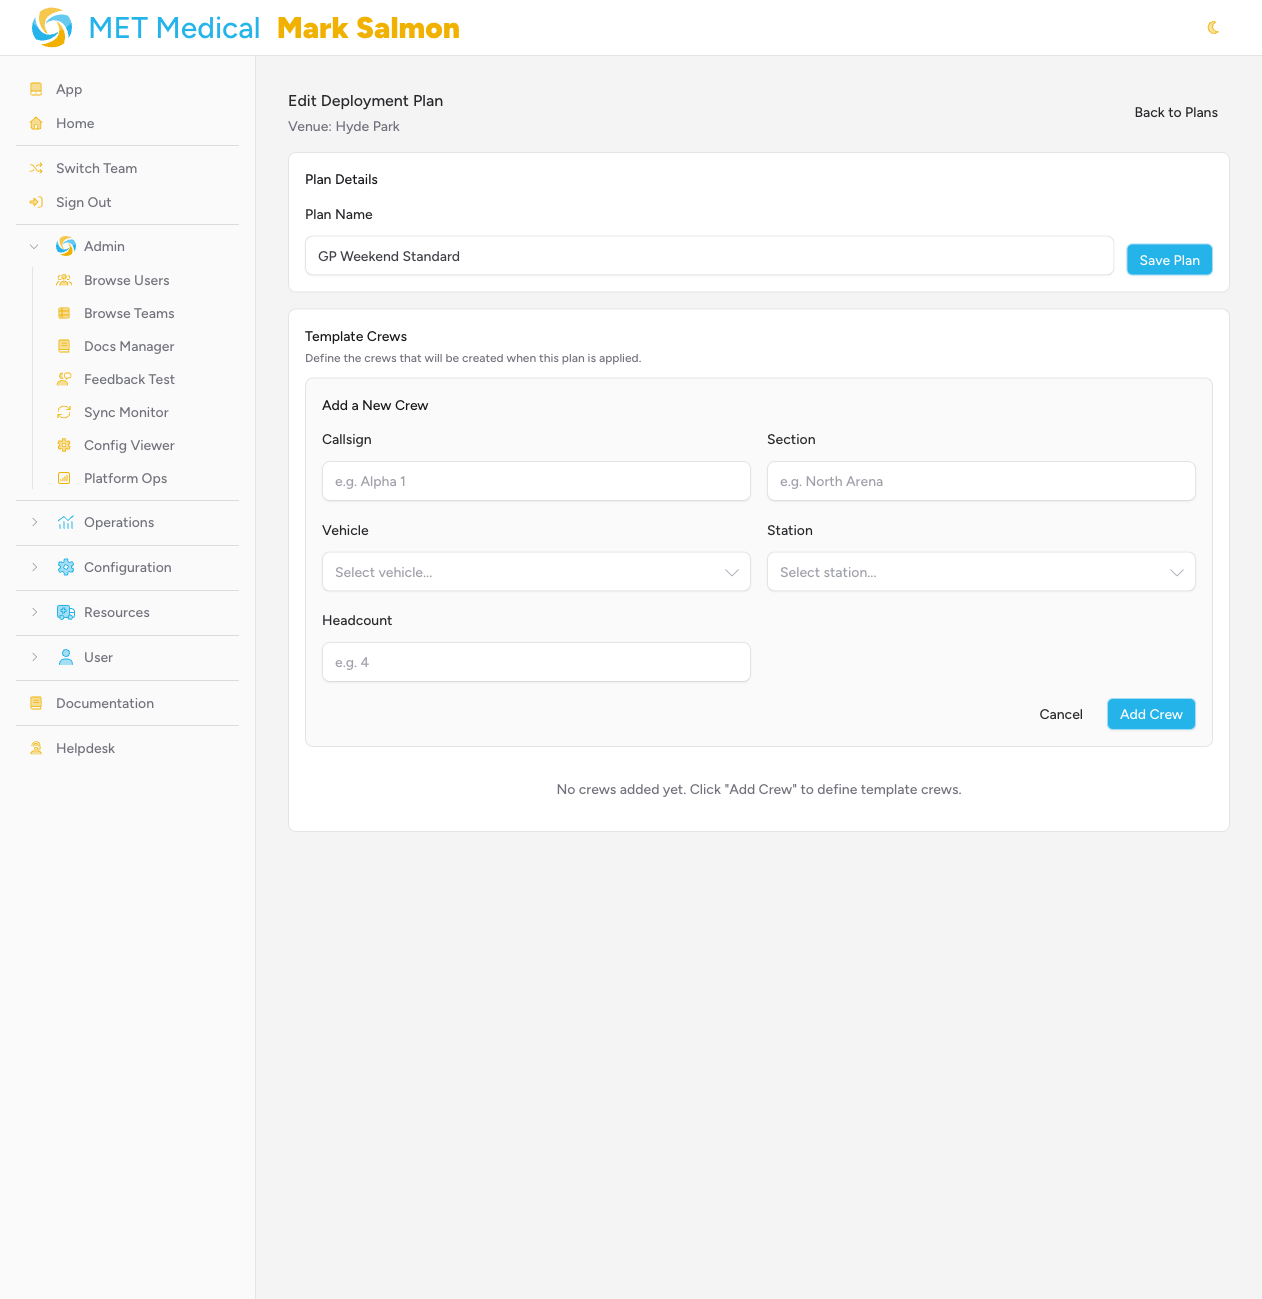
Repeat this for each crew you want in the plan. Crews are listed in the order you add them.
Step 5: Review and Reorder
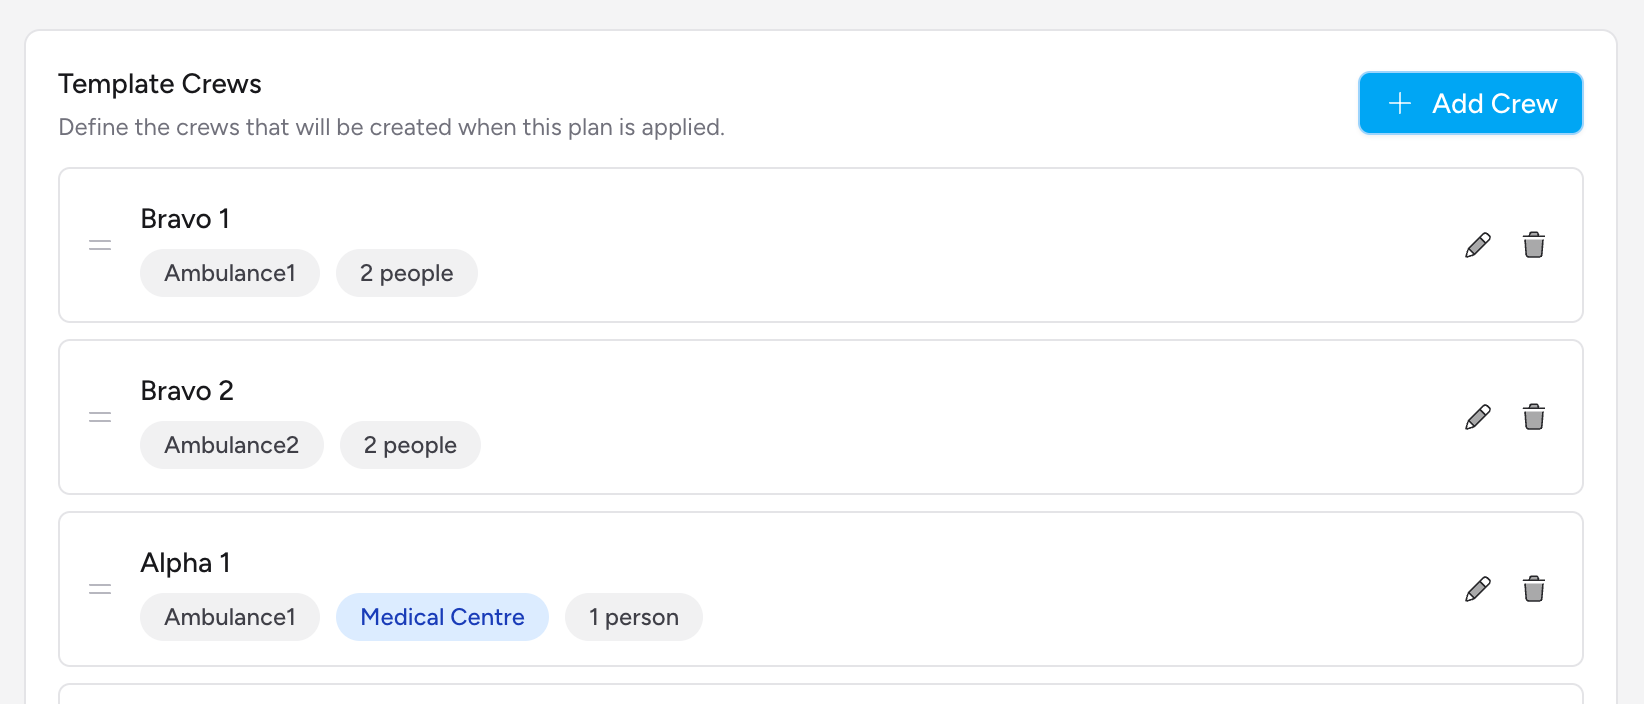
Once you've added your crews, they appear as cards in the Template Crews panel, grouped by Section if you've set one. Each card shows the callsign, vehicle badge, station badge, and headcount.
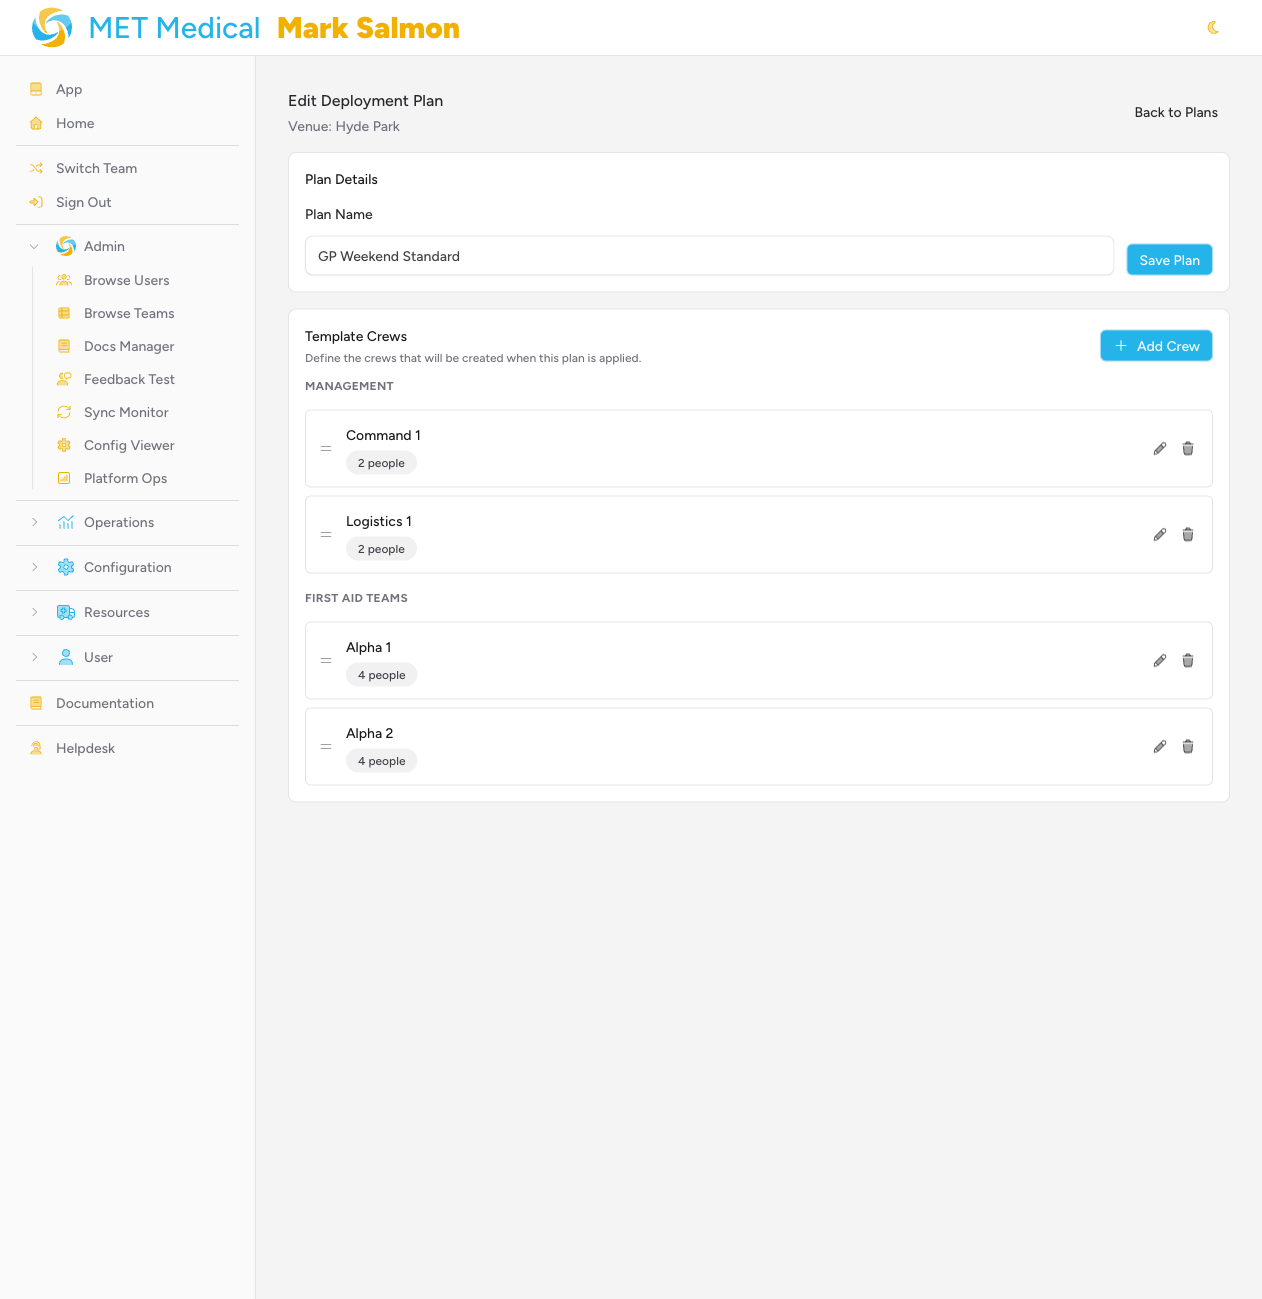
To reorder crews within the list, drag a card using the grip handle on the left-hand side. The order here is the order crews will be created when the plan is applied.
To edit or remove a crew, use the pencil or trash icons on the right of each card.
Using a Deployment Plan When Creating an Event
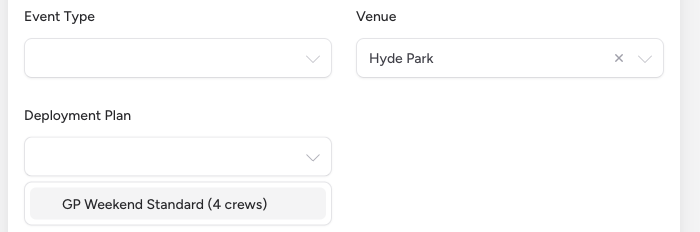
If you select a venue while creating an event, a Deployment Plan dropdown appears automatically. Choosing a plan here tells IndieBase to generate crew shells for every shift as soon as the event is created.
-
Start a new event from the sidebar (Operations > Events > New Event).
-
Select your Venue from the dropdown.
-
Once a venue is selected, the Deployment Plan dropdown appears. Choose the plan you want to apply.
-
Complete the rest of the event setup and click Next: Configure Shifts as normal.
When the event is created, IndieBase creates one set of crew shells per shift, matching the crews defined in the plan. The crews will have the correct callsigns, vehicles, station locations, and target headcounts already set.
You don't have to select a deployment plan — it's optional. If you leave it blank, no crews are pre-generated and you can add them manually later.
Applying a Deployment Plan to an Existing Event
If an event is already running, you can apply a deployment plan to a specific shift without affecting other shifts. This is additive — it adds new crew shells alongside any crews that already exist. Both applying and saving plans on a live event happen from the Crew Builder, inside the Control Room — not from the event page.
-
Open the event and click Control Room at the top of the event page.
-
In the Control Room header, click Crew Builder (or press B).
-
If the event has more than one shift, use the shift dropdown in the Crew Builder's header to pick which shift you want the plan applied to. This defaults to whichever shift is currently active in the Control Room.
-
Under the Deployment Plans heading near the top of the Crew Builder, find the plan you want and click Apply.
The Deployment Plans section only appears in the Crew Builder when the event is linked to a venue that has at least one deployment plan.
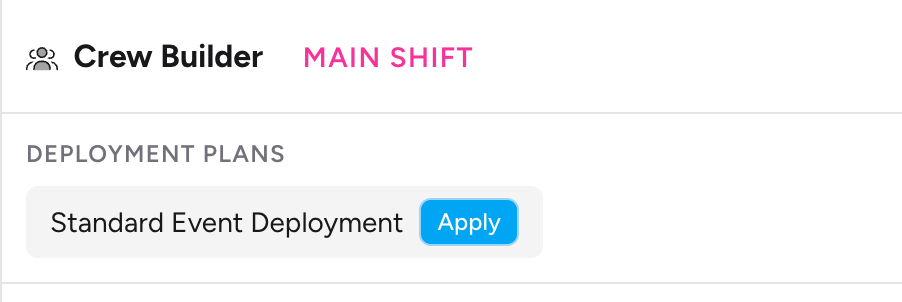
IndieBase creates the plan's crews in the selected shift immediately — there's no confirmation step. The new crews appear straight away in the Crews column of the Crew Builder and on the main Crew Board.
Saving an Event's Crew Structure as a Plan
If you've manually built a good crew structure for an event, you can save it as a deployment plan for future reuse. This requires the Super Admin role.
-
Open the Control Room and click Crew Builder (or press B).
-
Scroll to the Save as Template panel at the bottom of the Crew Builder.

-
Enter a name for the new plan in the Template name field (e.g.
GP Weekend Standard). -
Click Save.
IndieBase snapshots the event's current crew structure — callsigns, vehicles, and station assignments — across all its shifts, and saves it as a new deployment plan linked to the event's venue. Duplicate crews (same callsign, vehicle, and station across different shifts) are automatically merged into a single template entry. A confirmation toast appears once the template is saved.
The saved plan is stored under the event's venue and will be available the next time you create or work on an event at that venue. This panel only appears when the event is linked to a venue and you have permission to create deployment plans.
Headcount Indicators
If a target headcount was set on a crew (either via the deployment plan or manually), the Control Room surfaces it in two places, in two different formats:
- In the Crew Builder, each crew card shows a
current/targetstaffing badge — green when the crew has met or exceeded its target (e.g.4/4), amber when it's below target (e.g.2/4). - On the main Crew Board, crew cards don't show the numeric ratio. Instead, an understaffed crew is flagged with a text warning — Understaffed, or No Crew Members if nobody is assigned yet.
A crew's station location (set via the deployment plan or the crew record) isn't currently displayed inline on crew cards — it's used when the plan is applied, but isn't shown as a label afterwards.
Tips & Best Practices
- Name plans descriptively.
GP Weekend Standardtells you more thanPlan 1. Include the event type or scale of operation in the name. - Use Section to organise large plans. If your venue covers multiple areas, group crews by section (e.g.
North Stand,Pit Lane,Spectator Village). The section headings make the plan much easier to scan. - Mark crew stations as "Crew Station" type. Only General and Crew Station locations appear in the station picker when building a plan. Points of Interest are excluded, so make sure the right locations have the right type set.
- Set headcounts for critical crews. The staffing indicator is only as useful as the headcount targets you set. For any crew where under-staffing would be a risk, set a realistic target so you can spot gaps on the day.
- Applying a plan is additive. You can apply the same plan multiple times to the same shift if needed (though you'll end up with duplicate crew entries). If you've already applied a plan, apply a second time only if you want to add more copies of those crews.
- Save plans after successful events. If an event ran smoothly, use the Crew Builder's Save as Template panel to capture that crew structure before you change anything. It only takes a few seconds and you'll thank yourself at the next similar event.
Troubleshooting
The Deployment Plan dropdown doesn't appear when creating an event.
The dropdown only appears once you've selected a venue and that venue has at least one deployment plan. Check that your venue has plans set up under Resources > Venues > Manage > Deployment Plans.
The Deployment Plans section isn't showing in the Crew Builder.
It only appears when the event is linked to a venue that has deployment plans saved. If the event has no venue set, or the venue has no plans, the section won't show. Check the event's venue setting and the venue's deployment plans list.
A station location isn't appearing in the Station dropdown when building a plan.
Only General and Crew Station locations appear in the station picker. If the location you want is typed as Point of Interest, edit it via the venue's location settings and change the type.
I applied a plan but some crews are missing their station assignment.
Station assignments are only carried across if the location still exists on the venue. If a location was deleted after the plan was created, IndieBase silently skips the station assignment for affected crews rather than failing. There's currently no way to edit an existing crew's station from the Control Room — you'd need to remove the affected crew and recreate it, or fix the venue's locations and reapply the plan.
The Save as Template panel isn't visible in the Crew Builder.
You need the Super Admin team role (or be the Owner) to save a deployment plan — this is stricter than the standard Admin role. The panel is also hidden if the event has no venue set. If you can see the event but not the panel, ask your team's Super Admin or Owner to check your permissions or save the template on your behalf.
I saved a plan from an event but some crews are duplicated or missing.
When saving, IndieBase deduplicates across shifts by matching callsign, vehicle, and station. Crews with different callsigns are always saved separately. If you had crews with identical callsign/vehicle/station combinations in different shifts, only one copy is saved — this is intentional to avoid redundancy in the template.
- Managing Venues — set up venues and define the locations used in deployment plans
- The Control Room — where the Crew Builder, and its Apply/Save as Template actions, live
- Creating Crews in an Event — manually add and edit individual crews on an event
- Understanding Shifts — how shifts work and why they matter when applying deployment plans
- Setting Up a New Event — the full event creation flow, including venue and plan selection
- Team Roles — what Owner, Super Admin, Admin, and Member roles can each do