 IndieBase

Table of Contents
Creating Crews in an Event
How to create and manage crews (response units) using the Crew Builder in the Control Room
Creating Crews in an Event
Crews are the named response units that get dispatched to jobs. Build them in the Control Room's Crew Builder so dispatch is fast and accurate when it matters most.
Overview
A crew is a group of one or more team members who respond to incidents together, typically paired with a vehicle and identified by a callsign. Crews are created within a specific event and shift, and can then be dispatched to individual jobs as they come in.
All crew building happens in the Crew Builder, a slideover panel inside the Control Room. Changes you make there appear immediately on the Crew Board, so the rest of the team can see crews forming in real time.
Crews belong to a specific shift within the event, not the event as a whole. If your event has multiple shifts, make sure you've selected the correct shift before creating crews. See Understanding Shifts for more on how shifts work.
Before You Start
- You must have permission to update the event — the admin team role, or the Event Admin designation for this specific event.
- Team members you want to add to a crew must already have accounts and be members of your team.
- Navigate to the event's Control Room: open the event and click the pink Control Room button, or press the button from the event's card on the Events list.
- If the event has multiple shifts, select the correct shift in the Crew Builder before creating crews — crews are scoped to the shift they're built under.
Opening the Crew Builder
From anywhere in the Control Room, click the Crew Builder button in the header, or press B on your keyboard (as long as you're not typing in a text field). The Crew Builder slides in from the right.

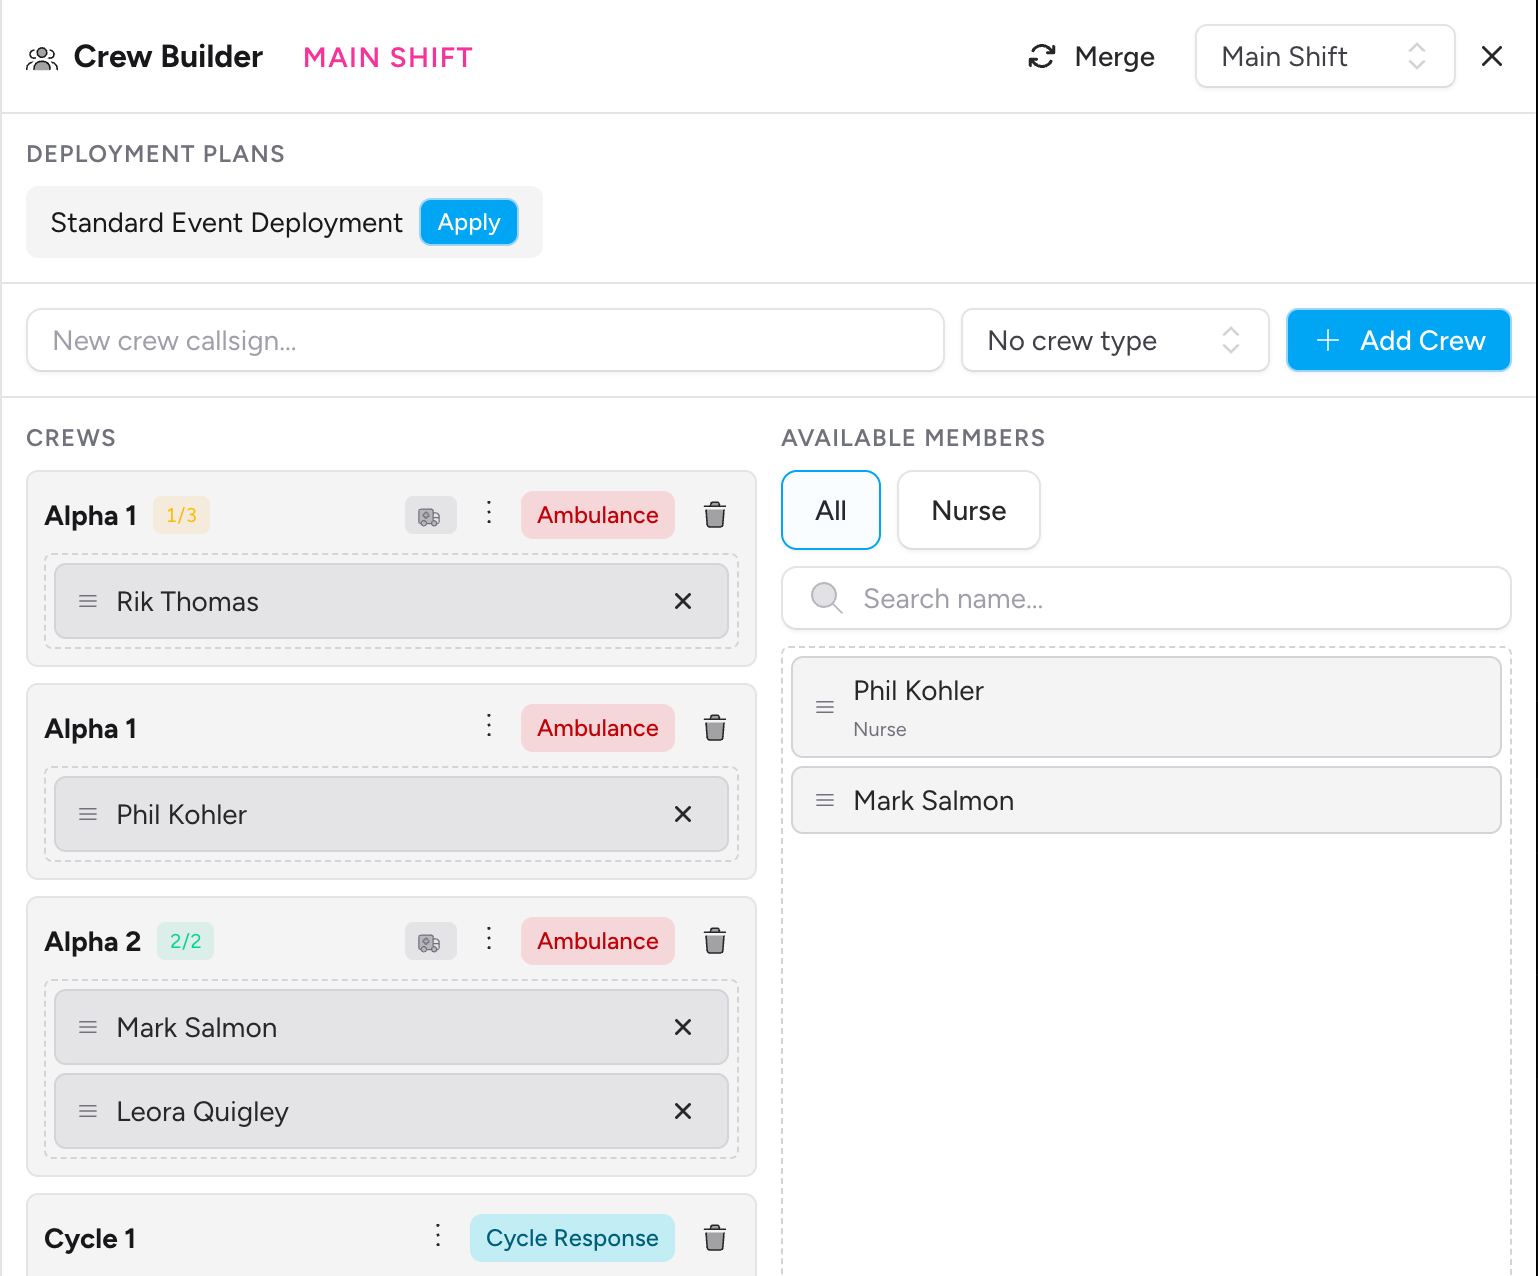
The Crew Builder is split into two columns: Crews on the left and Available Members on the right. If the event has more than one shift, a shift selector appears at the top so you can switch which shift's crews you're viewing and building.
Creating a New Crew
- With the Crew Builder open, find the Add Crew row at the top of the panel.
- Type a callsign into the New crew callsign field — for example,
ALPHA 1,MED 3, orBRAVO. - If your team uses crew types, choose one from the Crew type dropdown (or leave it as No crew type).
- Click Add Crew.

The new crew appears immediately at the top of the Crews column, with no members assigned yet.
Callsign is the only required field. Choose something short and unambiguous — it's what shows up on job cards and the Crew Board when the crew is dispatched.
Adding Members to a Crew
Team members who aren't yet on a crew for the selected shift appear in the Available Members column on the right, along with their clinical role.
To add someone to a crew, drag their name card from the Available Members column and drop it into the crew's member area on the left. You can also drag a member directly between two crews to move them, or drag a crew member back into the Available Members column to remove them from a crew.
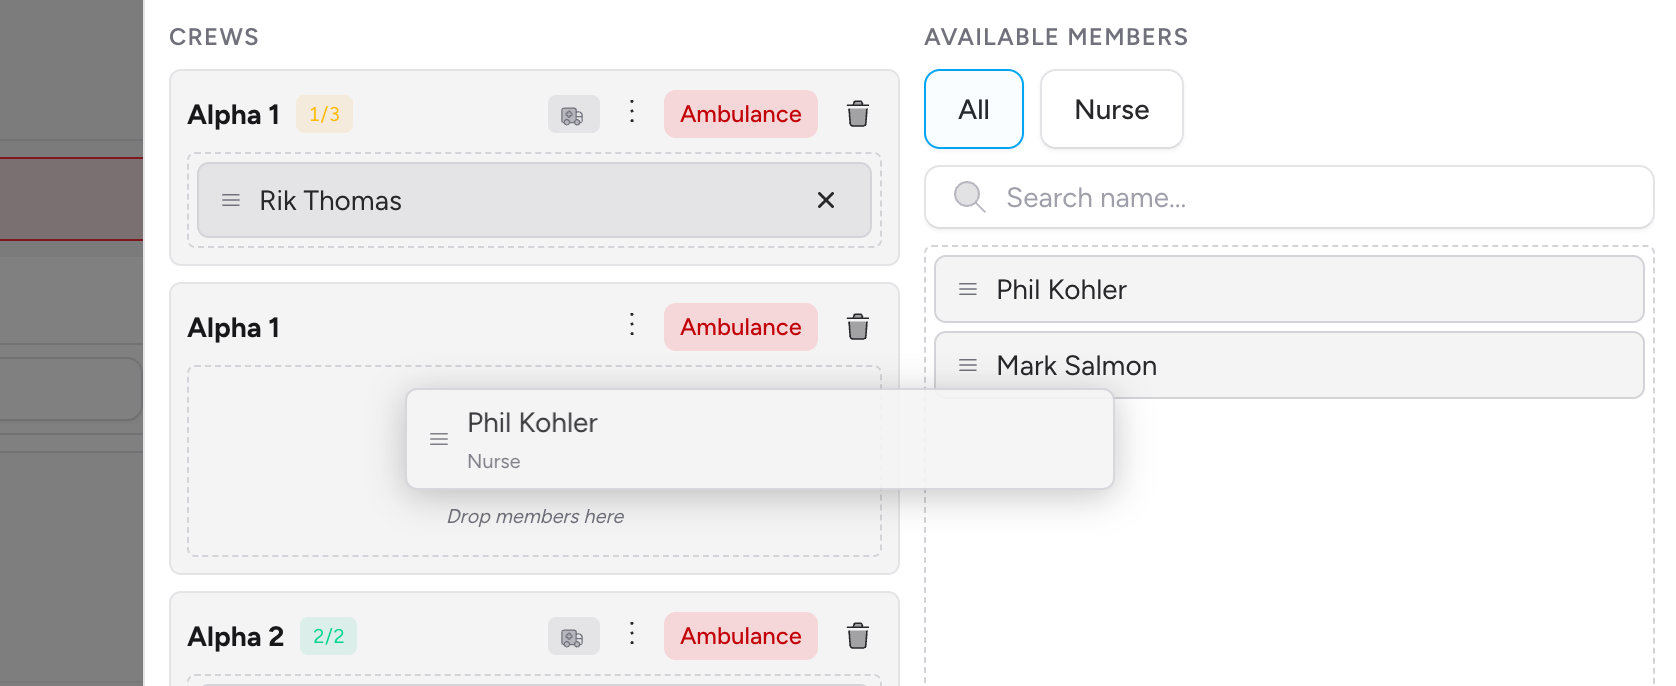
Use the search box and role filter buttons above the Available Members list to narrow down a long roster — press / to jump straight to the search field.
You can also click the × button on a member's card within a crew to remove them without dragging.
Managing an Existing Crew
Each crew card in the Crews column has an actions menu (the ⋮ button) for changes beyond membership:
- Move to shift — reassign the crew to a different shift on this event (only shown when the event has more than one shift)
- Crew type — change or clear the crew's type
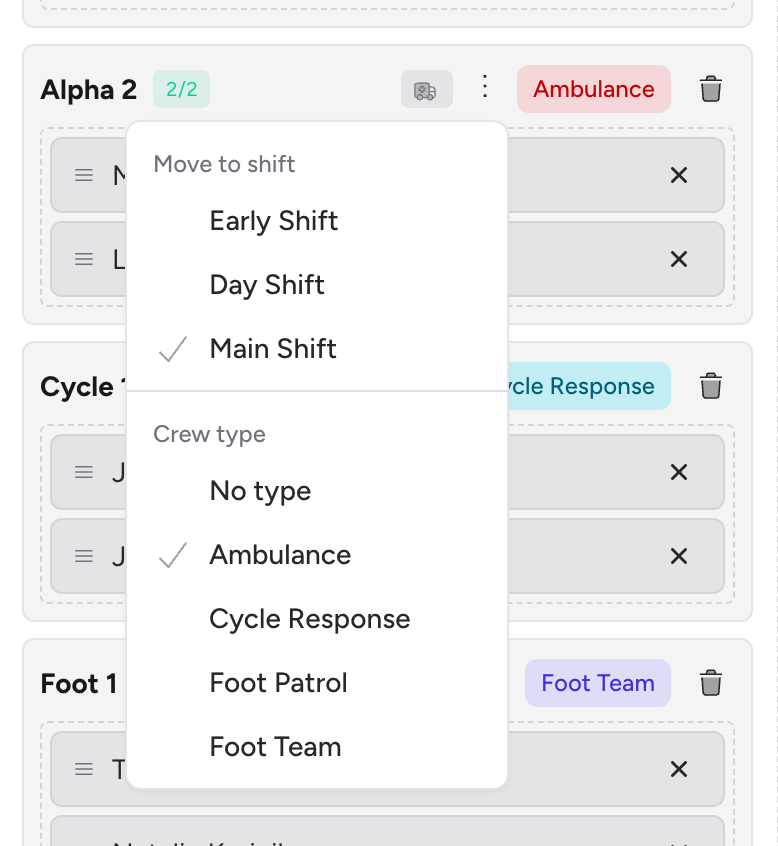
To remove a crew entirely, click the trash icon on its card and confirm. A crew that already has jobs attached to it can't be removed — you'll see an error instead.
Merging Two Crews
If circumstances change and you need to combine two crews — for example, a vehicle goes off-road and its crew joins another — click Merge in the Crew Builder header. Click a crew to select it as the target (kept), then click a second crew as the source (deleted). Review the merge preview, adjust the merged callsign if needed, then click Execute Merge.
Merging combines both crews' members, preserves job history from both, and permanently deletes the source crew.
How Crews Appear Elsewhere
Once crews exist, they show up throughout the Control Room and beyond:
- Crew Board: Every crew appears as a card, grouped by status (Available, Dispatched, On Scene, With Patient, Hospital, Break, Off Duty) or by crew type — this updates live as the crew's situation changes.
- Job feed: Dispatching a crew to a job shows its callsign as a badge on the job card. See Assigning Crews to a Job.
- Mobile app: Crews created here are available for selection when your team members set their active crew in the mobile experience.
Tips & Best Practices
- Create crews before the event starts. The more complete your crew list is before operations begin, the faster dispatch will be on the day.
- Keep callsigns short and unambiguous. Single-word or coded callsigns (e.g.
MED1,ALPHA) are quicker to read on the job feed and Crew Board than long descriptive names. - Save a deployment as a template. If the venue has deployment plans configured, you can save your built crews as a reusable plan from the bottom of the Crew Builder — see Deployment Plans.
- Use crew types for at-a-glance filtering. If your team has set up crew types (e.g. Medical, First Aid, Doctor), assigning them lets you filter both the Crew Builder and the Crew Board by type.
- Merge rather than delete when a vehicle goes down. Merging preserves job history from both crews; deleting a crew with existing jobs isn't possible anyway.
Troubleshooting
The Crew Builder button isn't visible or doesn't respond. You don't have permission to edit this event. You need either the admin team role or the Event Admin designation for this specific event.
A team member I want to add isn't in the Available Members list. They may already be assigned to another crew on the currently selected shift — check the other crews, or switch shifts. If they're missing entirely, they need to be a member of your team first.
I can't remove a crew. Crews that already have jobs attached can't be deleted. Use the merge feature instead if you need to consolidate it into another crew.
I dragged a member but nothing happened. Make sure you're dropping the member card into the dashed drop-zone area of the target crew (or back into Available Members), not onto the crew's header row.
- The Control Room — an overview of the Control Room's layout and live operations tools
- Adding Admins to an Event — grant event-level edit permissions to team members who aren't team admins
- Assigning Crews to a Job — dispatch a crew to a job from the Control Room's job feed
- Deployment Plans — save a built-out crew roster as a reusable template for future events at the same venue
- Understanding Shifts — how shifts organise jobs and crews within an event