 IndieBase

Table of Contents
Assigning Crews to a Job
How to dispatch crews to jobs from the Control Room or the in-app job editor, and record crew timing and outcomes.
Assigning Crews to a Job
Track exactly who responded to each incident — and when — by dispatching a crew directly to a job.
Overview
Crews are pre-built groups of team members, typically paired with a vehicle and identified by a callsign (e.g. "Alpha 1" or "TL2"). Dispatching a crew to a job creates a clear record of who responded, along with a timeline of key milestones: dispatch, mobile, on scene, patient contact, and clear.
You can dispatch crews to a job from two places:
- The Control Room (web) — best for control room and event admin use, where you're managing multiple jobs across an event
- The in-app job editor (PWA) — best for crew members on the ground, working directly inside a job record
Both approaches record the same information; the right one to use depends on where you're working at the time.
Before You Start
- The crew you want to dispatch must already exist for the event and shift. See Creating Crews in an Event to build crews using the Crew Builder.
- Dispatching from the Control Room requires permission to update the event — the admin team role, or the Event Admin designation for this event.
- A crew with no members cannot be dispatched — IndieBase will refuse and show an error.
Method 1: Dispatching a Crew from the Control Room
This is the quickest way to get a crew onto a job. Dispatching this way sets the crew's Dispatch time automatically to the current moment.
Step 1: Select a Crew on the Crew Board
In the Crews column of the Control Room, click the crew card you want to dispatch. It highlights with a ring to show it's selected. You can also press a number key 1–9 to select a crew by its position on the board.
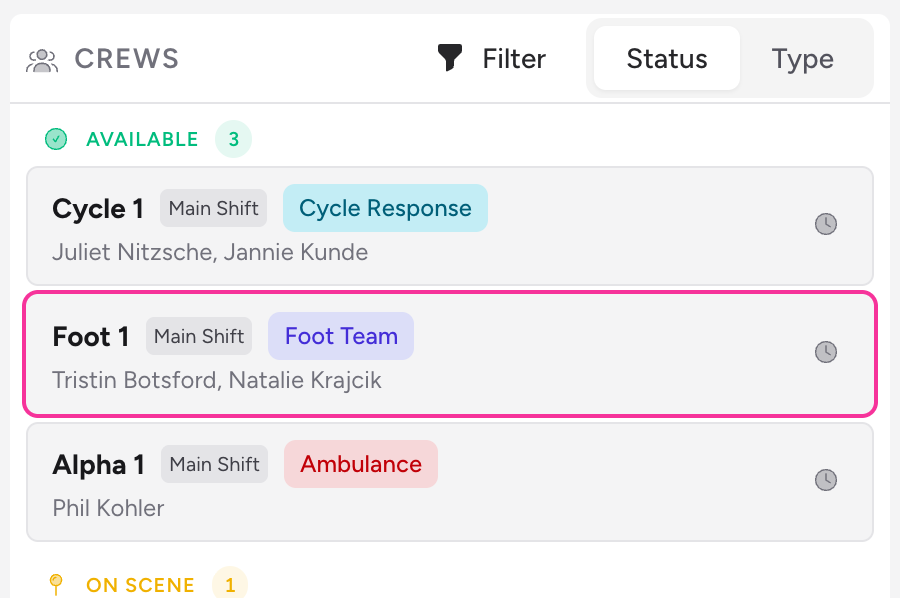
Only crews with at least one member can be selected and dispatched. A crew shown as "Uncrewed" isn't selectable.
Step 2: Click "Assign" on the Job
With a crew selected, every active job card in the Jobs feed shows an Assign button. Click it on the job you want this crew to respond to.
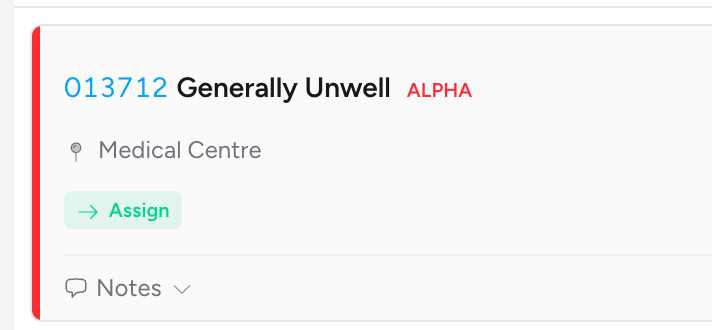
The crew's callsign immediately appears as a badge on the job card, its Dispatch time is set to the current time, and the selection clears — ready for you to select the next crew.
Press Escape at any time to clear the current crew selection without assigning it anywhere.
You can dispatch more than one crew to the same job by repeating steps 1 and 2 for another crew.
Assigning a Crew to an Unassigned Job
Jobs and incidents can be created without a crew — a medic working through the app can always continue past a missing crew allocation rather than being blocked (see Creating a Job Without a Crew). Anything created this way lands in the Control Room carrying an amber Unassigned badge instead of the usual crew badge, so it's never accidentally overlooked.
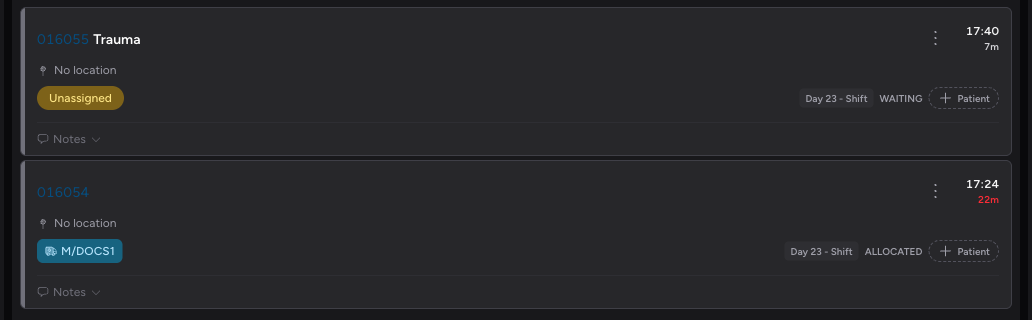
To find every crewless job on the event, click the Unassigned · N chip at the top of the job feed — see The Control Room for the full filter row. Assigning a crew to one of these jobs works exactly like Steps 1 and 2 above: select a crew on the Crew Board, then click Assign — the crew's Dispatch time is stamped to now, the same as any other dispatch, and the amber Unassigned badge is replaced by the crew's badge.
The one exception is if the medic who created the record gets allocated their own crew while it's still open on their device — tapping the one-tap notification described in Working in a Control-Room Managed Team attaches the crew without setting any times, since it isn't a dispatch action.
Viewing and Editing Crew Timing on a Job (Control Room)
Once a crew is dispatched, its timing details live in a popover attached to the crew's badge on the job card.
Step 1: Open the Crew's Timing Popover
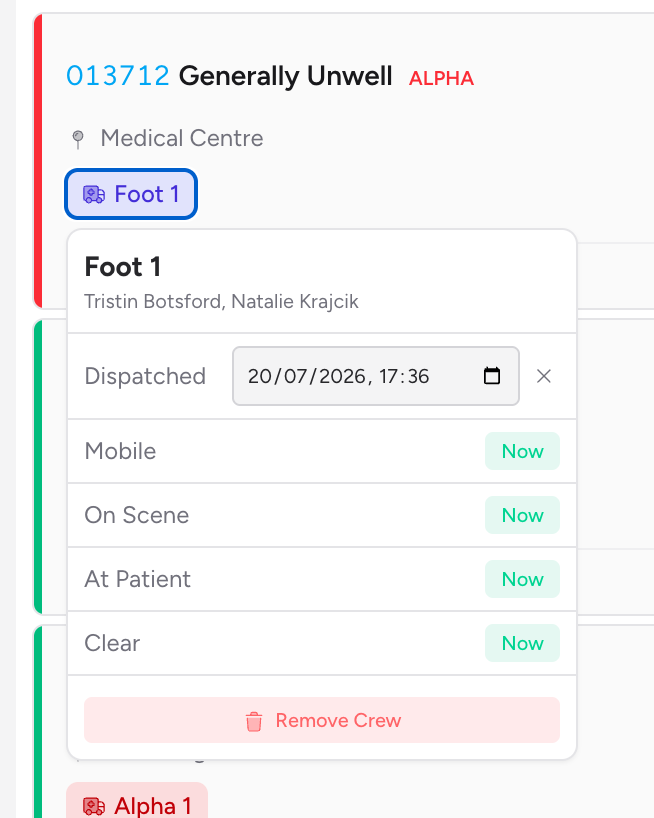
Click the crew's callsign badge on the job card. A popover opens showing the crew's callsign, member names, and five timestamp fields.
Step 2: Update Timing Fields
The following fields are available for each dispatched crew:
| Field | What it records |
|---|---|
| Dispatched | When the crew was tasked to respond |
| Mobile | When the crew began travelling to the scene |
| On Scene | When the crew arrived at the scene |
| At Patient | When the crew made contact with the patient |
| Clear | When the crew was clear and available again |
For a field that hasn't been set, click Now to stamp it with the current time. For a field that already has a value, edit the date/time directly or click the × button to clear it.
Step 3: Remove a Crew (if needed)
At the bottom of the popover, click Remove Crew and confirm. This detaches the crew from the job and removes all associated timing data.
A crew that has already reached the scene can't be removed this way — the removal is silently ignored. If you dispatched the wrong crew before they arrived on scene, remove them promptly; once "On Scene" is recorded, correct the job's crew assignment by adjusting timestamps instead.
Method 2: Managing Crews from the In-App Job Editor
Inside the PWA job editor, the Crews panel lets crew members on the ground add themselves (or other resources) to a job and update their own timing as the job progresses.
Step 1: Open the Job
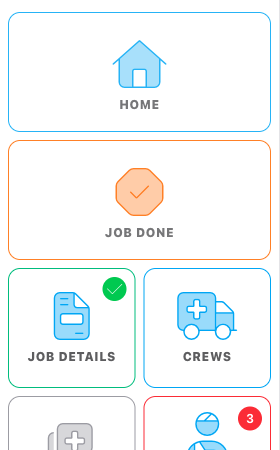
Open the relevant job from the home screen. The job editor opens with a sidebar on the left showing all available panels.
In the left sidebar, tap or click the Crews panel button (ambulance icon).
Step 3: Add a Resource
The Add Resource button is available in every crew management mode, including control-room managed teams — attaching a crew that already exists records who attended, it doesn't change the crew. What a managed team blocks is building crews. See Working in a Control-Room Managed Team.
At the top of the Crews panel, click the Add Resource button. A drawer slides in from the left listing the available crews — crews that already exist, are still active, and aren't already on this job. If the job belongs to a shift, only crews on that same shift are listed. Each card shows the event name, callsign, vehicle, and member names. Click a crew card to add that crew to the job immediately.

The drawer only offers crews that already exist — it cannot create one. If the crew you need isn't listed, build it first in the Control Room's Crew Builder or on the event page (see Creating Crews in an Event), then come back.
Click the × button at the bottom to close the drawer without making changes.
Step 4: Update Crew Timing
Each assigned crew appears as a panel within the Crews section, showing the crew's callsign, vehicle, and member names.
Use the time fields to record the crew's timeline as events happen. Each field has a clock button (sets to now) and a clear button (removes the time).
The fields shown depend on the crew's current Result selection:
| Result selected | Fields visible |
|---|---|
| (none) | Dispatch, Mobile, Scene, Patient, Clear |
| Stand Down Before Mobile | Dispatch, Clear |
| Stand Down Before Scene | Dispatch, Mobile, Clear |
| Stand Down Without Patient Contact | Dispatch, Mobile, Scene, Clear |
| Patient Treated / Patient Conveyed | All fields |
This table shows the standard five-point (emergency) set. Jobs on a template configured for transport work show nine differently-worded points instead, and a team admin can compose a custom set — the stand-down hiding above applies to the equivalent fields in every set. See Crew Time Points.
Changes are saved automatically as you work. There is no separate Save button for the Crews panel.
Step 5: Edit a Crew's Details
If you are a member of a crew assigned to this job, an Edit My Crew button appears on that crew's panel. Click it to open the edit drawer, where you can update:
- Event — which event this crew is linked to
- Callsign — the crew's identifier
- Vehicle — the vehicle assigned to this crew
- Crew Members — add members using the + button; remove them using the × next to each member
At the bottom of the drawer you have two save options:
- Save (for this job only) — updates the crew details on this job without changing the crew's standing configuration
- Save (and set as current crew) — saves the changes to this job and also sets this as your active crew for future jobs
Step 6: Remove a Crew from the Job
Click the red trash icon on the crew's panel to remove it from the job. You'll be asked to confirm before the crew is deleted.
Managing Crews on an Event
Before you can dispatch a crew to a job, the crew needs to exist on the event and shift. Crew creation and membership are managed from the Crew Builder in the Control Room — see Creating Crews in an Event for the full walkthrough.
What Happens When You Close Out a Job
When you mark a job as Done or Stand down (from the job's ⋮ (Job actions) menu), any crews assigned to the job that don't yet have a Clear time will have it set automatically. This ensures the record is complete even if you forgot to log it during the job.
Troubleshooting
Nothing happens when I click a crew on the Crew Board. Crews with no members ("Uncrewed") aren't selectable — add at least one member via the Crew Builder first.
No "Assign" button appears on job cards. You need to select a crew on the Crew Board first — the Assign button only appears on active job cards once a crew is selected.
I got an error saying the crew can't be dispatched. A crew with zero members can't be dispatched. Add a member to the crew in the Crew Builder, then try again.
The crew I need isn't in the Add Resource drawer. The drawer only lists crews that already exist, are active, and match the job's shift timing — and it hides crews already on this job. On a control-room managed team, ask the control room to build the crew; on a self-service team, ask the crew to open the app and check their crew is active.
Removing a crew from a job did nothing. A crew that has already reached the scene ("On Scene" time recorded) can't be removed from a job. Correct its timestamps instead if it was dispatched in error.
I can only see the Edit My Crew button on one crew, not all of them. The Edit My Crew button only appears on crews that include you as a member. To edit a different crew's details, use the Crew Builder in the Control Room.
- The Control Room — an overview of the Control Room's layout and live operations tools, including the Unassigned filter chip
- Creating Jobs in an Event — create the job before dispatching a crew to it
- Creating Crews in an Event — build the crews available for an event before operations begin
- Modifying Crew Times and Adding Notes to a Job — update crew timestamps and add notes from the job feed
- Vehicles — add vehicles to your team so they can be assigned to crews
- Setting Up Your Crew — how crew members configure their active crew in the mobile app
- Working in a Control-Room Managed Team — what changes for crew members when self-service crew management is switched off
- Adding a Job — creating a job without a crew, which is how jobs end up in the Unassigned pool
- Event Config — where a team administrator switches Crew Management between Self-service and Control-room managed
- Understanding Shifts — how shifts organise jobs and crews within an event