 IndieBase

Table of Contents
Modifying Crew Times and Adding Notes to a Job
Record crew movement times and leave notes on a job directly from the Control Room job feed
Modifying Crew Times and Adding Notes to a Job from the Event Page
Record crew movement times and add operational notes to a job in real time from the Control Room's job feed.
Overview
Every job card in the Control Room's job feed carries a crew badge for each crew that's been dispatched to it. Clicking a badge opens a popover with that crew's timestamp fields. Each job card also has its own collapsible Notes section for free-text notes. Updates happen instantly — there's no separate save step — and the job's status updates automatically as timestamps are filled in.
This is designed for use on the day of the event — quickly logging when a crew was dispatched, when they arrived on scene, when they made patient contact, and so on.
Before You Start
- You must have permission to update the event — the admin team role, or the Event Admin designation for this event — to change crew times or add notes from the Control Room.
- A crew must already be dispatched to the job before its badge (and timing popover) appears. See Assigning Crews to a Job for how to dispatch one.
- The Control Room updates live over a websocket connection — changes made by other users appear automatically, no page refresh needed.
Modifying Crew Times
Step 1: Open the crew's timing popover
On any job card in the feed, find the crew badge — a small pill showing the crew's callsign. Click it to open a popover showing the crew's members and five timestamp fields.
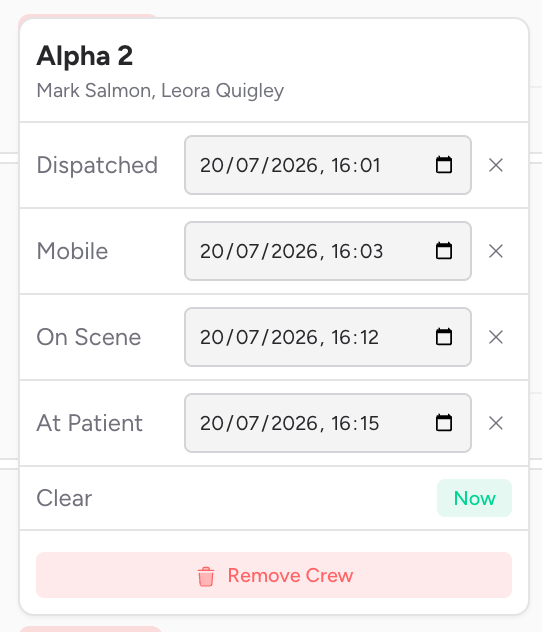
If a crew is on a break or off duty and cleared from the job, its badge appears dimmed. You can still open the popover to review or correct its times.
Step 2: Understand the time fields
The five time fields represent the key stages of a crew's response to the job. The job's status (shown on the card) is derived automatically from which fields are filled across all its crews:
| Field | What it records | Effect on job status |
|---|---|---|
| Dispatched | When the crew was dispatched to the job | Sets status to Allocated |
| Mobile | When the crew became mobile (en route) | Sets status to Mobile |
| On Scene | When the crew arrived on scene | Sets status to Scene |
| At Patient | When the crew made patient contact | Sets status to Patient |
| Clear | When the crew cleared the job | No direct status change |
Times are interpreted as UK local time (Europe/London), so you don't need to think about UTC during summer time.
Patient transport (PTS) teams see different fields here. If the team is configured for transport work, this same popover shows nine time points worded for a full pickup-to-return journey (Allocated, Mobile to Pickup, Arrived at Pickup, Patient Aboard, Arrived at Destination, Handover Complete, Collected for Return, Arrived Back, Run Complete) instead of the five described below. See Crew Time Points for what each one means.
Step 3: Set a time to now
For any field that hasn't been recorded yet, the popover shows a Now button in its place. Click it to stamp that field with the current time immediately.
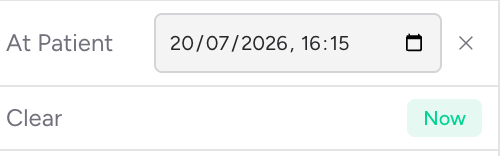
This is the quickest way to record times during a live event — open the badge, click Now, done.
Step 4: Edit or clear a time manually
Once a field has a value, it's shown as an editable date/time input rather than a Now button. Change it directly to correct a mistaken entry — the new value saves as soon as you move focus away from the field.
To remove a recorded time entirely, click the × button next to the field.
Clearing a time affects the job's status. For example, clearing every crew's Dispatched time moves the job back to Waiting.
Step 5: Remove a crew from the job (if needed)
At the bottom of the popover, click Remove Crew to detach that crew from the job entirely, then confirm. This isn't available once the crew has reached the scene — see Assigning Crews to a Job for what to do instead.
Adding Notes to a Job
Each job card has its own Notes section, collapsed by default.
Step 6: Open the Notes section
Click Notes near the bottom of the job card to expand it. If the job already has notes, a count badge shows how many.
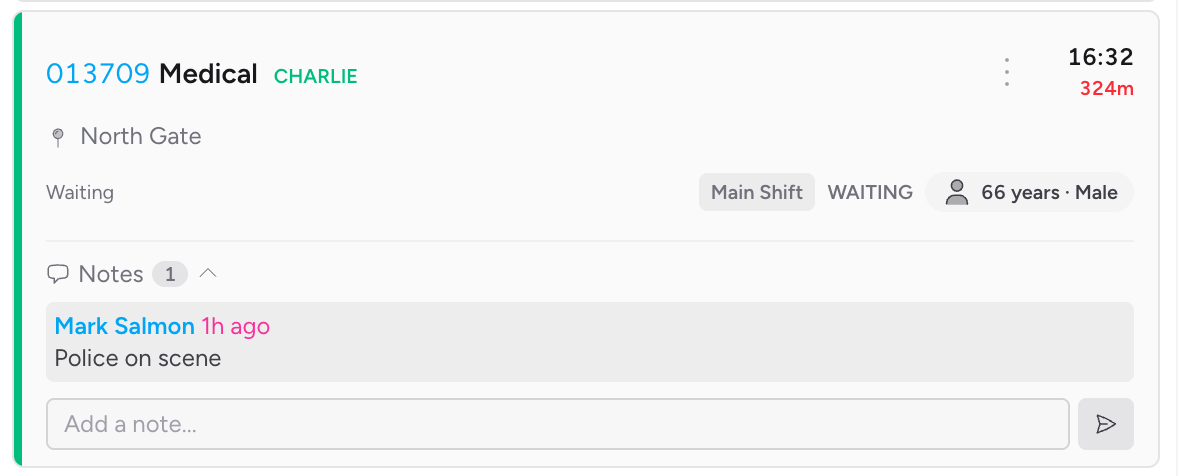
Step 7: Type and save your note
Click the Add a note... input at the bottom of the Notes section and type your note. Press Enter, or click the send button beside the field, to save it.
The note appears immediately in the list above the input, showing your name and how long ago it was posted.
Step 8: Delete a note
You can only delete notes that you wrote yourself. Hover over one of your own notes to reveal a trash icon and click it to delete — there is no confirmation prompt beyond the browser's confirm dialogue, so take care.
Other users' notes never show a delete option.
Event-Wide Notes
Notes added here are specific to a single job. For notes, macros, and milestones that apply to the whole event rather than one job, use the Event Log panel on the right-hand side of the Control Room (press L to switch to it). See The Control Room for more on the Event Log.
How Job Status Updates Automatically
You don't need to manually change the job's status. IndieBase derives it from the crew time fields you fill in:
- No times filled in on any crew → Waiting
- At least one crew has a Dispatched time → Allocated
- At least one crew has a Mobile time → Mobile
- At least one crew has an On Scene time → Scene
- At least one crew has an At Patient time → Patient
- The patient record has a departure time → Left Scene
- The patient record has a hospital arrival time → Hospital
- The job has been marked done or stood down → Done
Tips and Best Practices
- Work quickly with the Now button. During a busy event, the fastest workflow is: click the crew badge, click Now, close the popover, move on.
- Every job card's Notes section is independent. Expanding one job's notes doesn't affect any other — you can have several open at once.
- Notes are permanent records. Only your own notes can be deleted. Use the notes field for anything that needs to travel with the job — handover information, observations, context for the patient record.
- All team members can see all notes. Notes are shared across the team. Don't include information that should be restricted to specific individuals.
- Times inform status, which informs reporting. The accuracy of your crew times directly affects the accuracy of response time KPIs for the event, so it's worth recording them as they happen rather than retrospectively.
Troubleshooting
I don't see a crew badge on a job card. No crew has been dispatched to this job yet. Select a crew on the Crew Board and click Assign on the job — see Assigning Crews to a Job.
I entered a time but it didn't save. Times save when focus leaves the field. Make sure you've clicked away from the field or pressed Tab after entering the time. If it still hasn't updated, check your connection — the "Live"/"Offline" indicator in the Control Room header shows connection status.
I can't see the Notes section or crew badge popovers. You need permission to update this event — the admin team role or the Event Admin designation. Contact your team administrator if you believe this is an error.
The job status isn't updating after I enter a time. The Control Room updates live — if it hasn't refreshed, check the connection indicator in the header. A prolonged disconnect falls back to polling every few seconds.
I accidentally cleared the wrong time. Re-enter the time manually via the crew badge popover. If you're not sure what the time was, open View record from the job's ⋮ menu to check the full job history.
- The Control Room — an overview of the Control Room's layout, including the Event Log
- Assigning Crews to a Job — dispatch a crew to a job before its time fields appear
- Creating Crews in an Event — create and manage the crews available for the event
- Creating Jobs in an Event — create, edit, and delete jobs, and understand how job status works
- Crew Time Points — the nine-point set PTS teams see instead of the standard five