 IndieBase

Table of Contents
Creating Jobs in an Event
How to create, edit, and delete jobs (incidents) from the Control Room during a live event
Creating Jobs in an Event
A Job in IndieBase is the core record for a call or incident that occurs during an event — create, edit, and close jobs from the Control Room's job feed.
Overview
Every patient care episode in IndieBase starts with a job. When an incident is reported at your event — whether it's a radio call, a bystander flagging someone down, or a direct request — you create a job in the Control Room to log it. From there you dispatch a crew to respond, track their progress, and attach a patient record once care begins.
Jobs sit within events, so all jobs created during a deployment are automatically grouped together for reporting, statistics, and oversight.
Before You Start
- You must be in the Control Room for the event — jobs are always created in the context of an event.
- Only users with permission to update the event — team admins and designated event admins — can create, edit, or delete jobs from the Control Room.
- The Control Room shows jobs for whichever shift is currently selected. If your event has multiple shifts, make sure the correct shift tab is active before logging a new job — the job's start time must fall within the selected shift's time window, otherwise you'll need to switch to the correct shift (or "All shifts") first.
Step-by-Step Guide
Step 1: Open the Control Room
From the event's setup page, click the pink Control Room button (TV icon) near the top of the page. You can also open the Control Room directly from an event card on the Events list.
The Control Room opens as a full-screen dashboard with the Jobs feed on the left, the Crews board in the middle, and event-wide panels on the right.
Step 2: Open the New Job Form
At the top of the Jobs panel, click New Job. You can also press N on your keyboard at any time (as long as you're not typing in a text field) to open the same form.
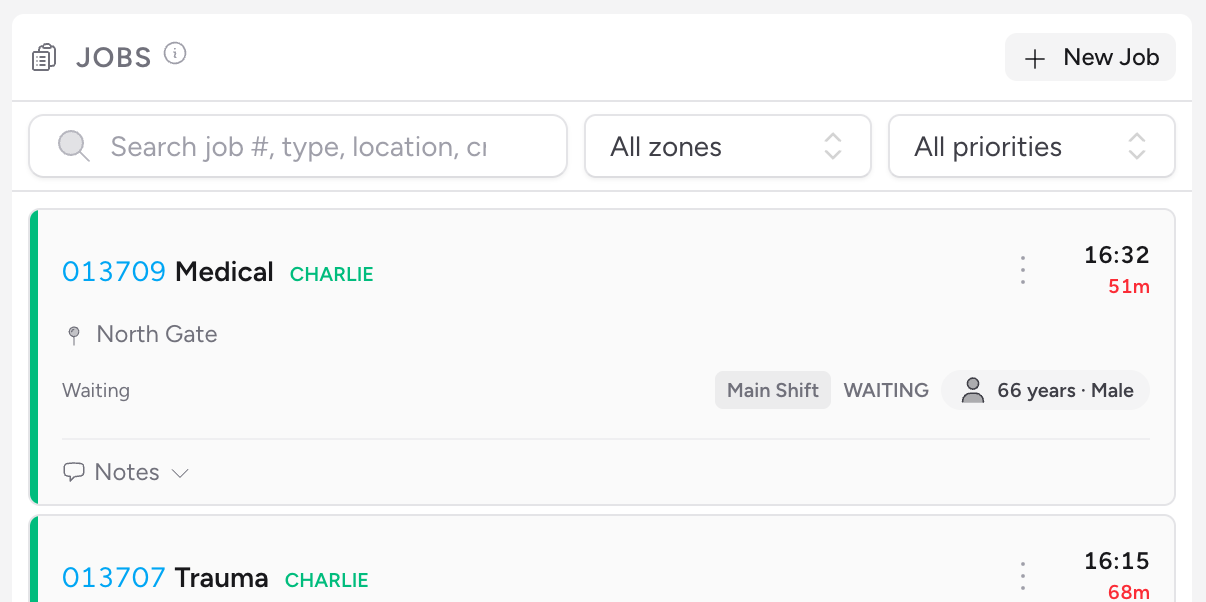
You will only see the New Job button if you have the correct permissions. If it's not there, you are not an admin or event admin for this event.
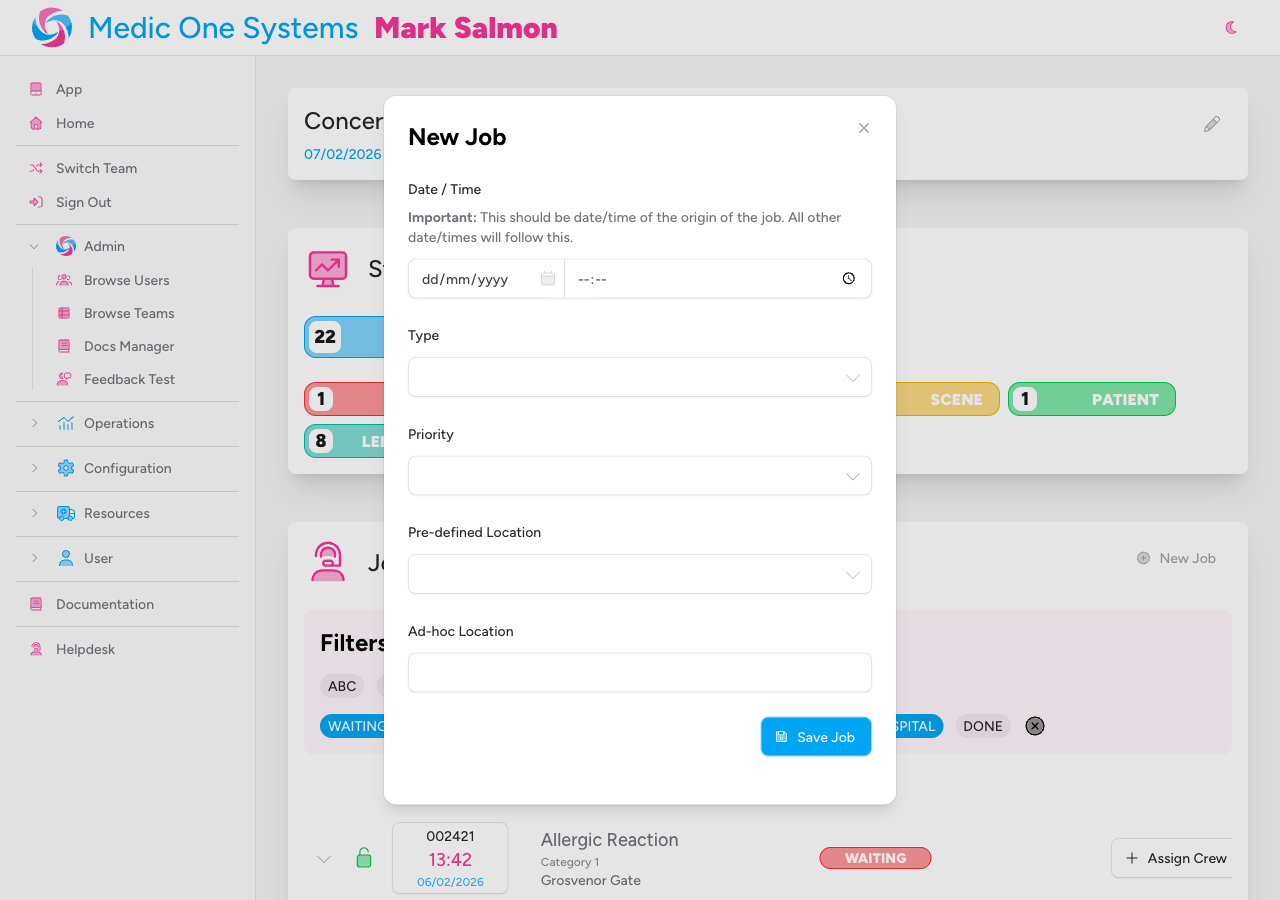
A modal dialogue opens with the job creation form.
Step 3: Set the Job Start Time
The Job start time field records when the incident originated — for example, when the call was received or the incident was first reported. It opens pre-filled with the current time.
Click the clock icon to stamp the field with the current time, or type/pick a specific date and time directly.
Important: This is the reference point the job's status timeline is built from. If you're logging the job retrospectively, use the actual time the call came in, not the time you're typing it up. The time must fall within the currently selected shift's window — if it doesn't, switch to the correct shift (or "All shifts") first.
Job start time is required.
Step 4: Select the Job Type
Use the Type dropdown to describe the nature of the incident.
The default job types available (unless your team has customised the list) include:
- Abdominal/Flank pain
- Alcohol Intoxication/Related
- Allergic Reaction
- Assault
- Back Pain
- Bleeding
- Breathing/ENT Problems
- Burns
- Cardiac/Respiratory Arrest
- Chemical Inhalation/Incident
- Chest Pain/Cardiac Problem
- Choking
- Diabetic Problems
- Drowning/Water Incident
- Electrocution/Shock
- Entrapments (non RTC)
- Eye Problems
- Falls <12ft / Falls >12ft
- Fire
- Fitting
- Fracture
- Generally Unwell
- Headache
- Heat/Cold Exposure
- HCP Admission Protocol
- Interhospital transfer
- Limb Pain/Injury
- Maternity Issues
- Mental Health Issues
- Minor Ailment/Injury
- Overdose/Ingestion - Accidental
- RTC variants (Difficult Access, Entrapment, Moderate/Major Injury, No/Minor Injury, Unconscious/Arrest)
- Shot/Stabbing (Central), Shot/Stabbing (Peripheral)
- Social/Domestic Issues
- Stroke/Neurological
- Trauma
- Unconscious/Faint
Your team may have a customised list of job types configured — if your list looks different from the above, that's expected and intentional.
Type is required.
Step 5: Set the Location (Optional)
Type into the Location field to describe where the incident is happening — for example, "Gate 3 car park" or "Pit lane exit".
If your event is linked to a venue with pre-defined locations, start typing to see matching venue locations as suggestions. Selecting one attaches that location's GPS coordinates to the job automatically. You can also just type free text if the location isn't one of the pre-defined points — it's saved as-is, without coordinates.
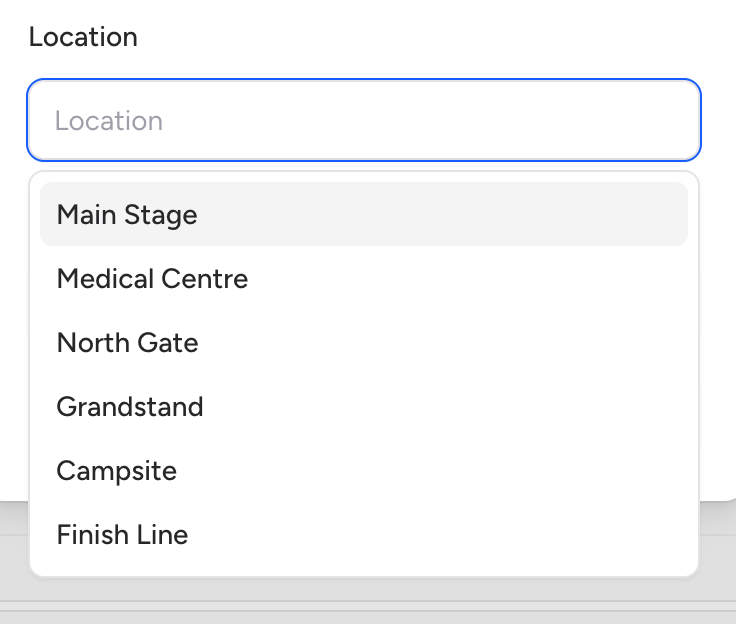
Location is optional — you can leave it blank and fill it in later by editing the job.
Step 6: Set the Priority (Optional)
The Priority dropdown lets you indicate the urgency of the call. The default options are:
| Priority | Typical Use |
|---|---|
| Category 1 | Immediately life-threatening |
| Category 2 | Emergency |
| Category 3 | Urgent |
| Category 4 | Less urgent / routine |
Priority is optional — leave it blank if your team doesn't use a priority system or the priority isn't yet known. Your team may have configured different priority labels to match your organisation's protocols.
Step 7: Save the Job
Click Create Job. The modal closes and the new job appears at the top of the active jobs feed, showing its job number, type, and elapsed timer.
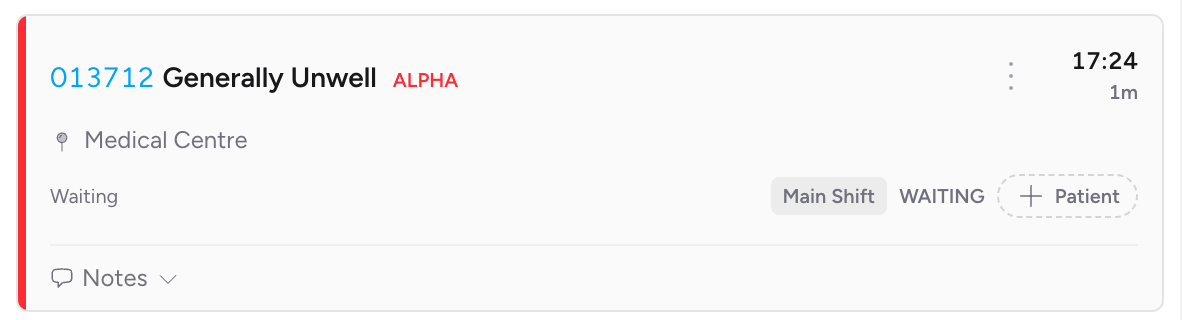
The job starts with no crew assigned. See Assigning Crews to a Job for how to dispatch a crew from the Control Room.
Editing a Job
Every job card has a ⋮ (Job actions) button in its top-right corner. Click it and choose Edit job to open the same form pre-filled with the job's current details — you can update the type, location, priority, and (within limits) the start time.
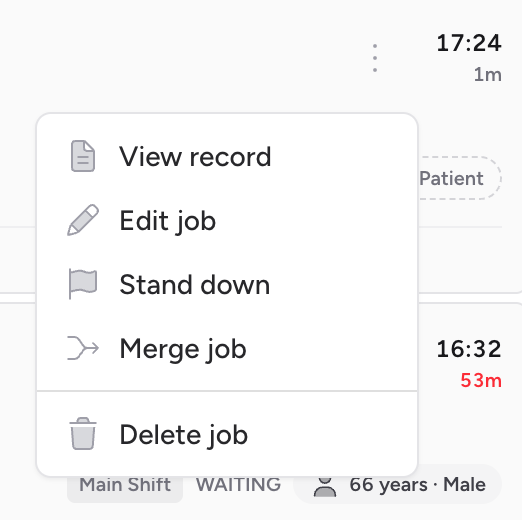
Once a job already has a start time recorded, that time can be corrected but not cleared entirely — and it can't be moved to later than the moment a crew was first dispatched to the job.
Deleting a Job
Open the ⋮ (Job actions) menu on the job card and choose Delete job. You'll be asked to confirm — this permanently removes the job and cannot be undone, so use it for mistaken or duplicate entries rather than jobs that were genuinely stood down (use Stand down for those instead — see Assigning Crews to a Job).
Job Statuses
Job status in IndieBase is calculated automatically from the crew timestamps recorded against the job — dispatch, mobile, on scene, patient contact, and clear. You never set the status manually.
| Status | What It Means |
|---|---|
| Waiting | Job created, no crew dispatched yet |
| Allocated | A crew has been dispatched but has not yet gone mobile |
| Mobile | At least one crew is en route |
| Scene | At least one crew has arrived on scene |
| Patient | A crew has made patient contact — active treatment is underway |
| Left Scene | The patient has a departure time recorded but was not conveyed to hospital |
| Hospital | The patient has a hospital arrival time recorded |
| Done | The job has been marked done or stood down |
See Assigning Crews to a Job and Modifying Crew Times and Adding Notes to a Job for how crew timestamps are recorded from the job card.
Tips and Best Practices
- Create the job as soon as the call comes in. Even without every detail, getting the start time right is the most important thing — you can update the type and location afterwards via Edit job.
- Use the correct call time. The field represents when the incident was reported, not when you opened the Control Room to log it.
- Location suggestions speed things up. If your venue has pre-defined locations, typing a matching name attaches GPS coordinates automatically — free text does not.
- Dispatch a crew promptly. A job sitting in Waiting means no one has been dispatched yet. At busy events, keep an eye on the active feed for jobs without a crew badge.
- Use N for speed. Pressing N anywhere in the Control Room (outside a text field) opens the New Job form instantly.
Troubleshooting
I can't see the New Job button. You don't have edit permissions for this event. Job creation requires the team admin role or event admin designation. Contact your team administrator if you believe this is an error.
I saved the job but it's not appearing in the feed. Check whether a search term or filter is active in the Jobs panel — click Clear next to the filters to reset. Also check you're viewing the shift the job's start time falls into; jobs are shown per-shift (plus any unassigned jobs, which appear under every shift).
I entered the wrong start time. Open the job's ⋮ menu and choose Edit job to correct it. Note that a start time can't be moved later than the point a crew was first dispatched — if you need to fix that, correct the crew's dispatch time instead (see Modifying Crew Times and Adding Notes to a Job).
The job type I need isn't in the list. Job types are configured per team. Ask your team administrator to add the required job type via the team configuration settings.
Pressing N doesn't do anything. Keyboard shortcuts are disabled while a text field, dropdown, or text area has focus. Click elsewhere in the Control Room first.
- The Control Room — an overview of the Control Room's layout and live operations tools
- Assigning Crews to a Job — dispatch a crew to a job you've created
- Modifying Crew Times and Adding Notes to a Job — record crew timestamps and add notes to a job
- Filling In the Patient Record — complete the clinical documentation once a patient has been added to a job